
Setting up a drawing tablet is an essential step for any aspiring digital artist. Whether you have a Huion, XP-Pen, Wacom, or any other brand, the process generally involves connecting the device to your computer and installing the necessary drivers and software. Once you know how to set up a drawing tablet, you can ensure optimal performance and a smooth digital art experience.
Inspect the package that came with your tablet to find the included drivers or software, which are often on a CD or USB drive. If these are not available, you can usually download them from the manufacturer’s website. Properly installing these drivers is crucial as they enable your computer to communicate effectively with the tablet.
In some cases, you may need to restart your computer or create an account to access additional software that enhances the tablet’s functionality. Completing these steps ensures that your device is fully ready for use, allowing you to focus on your creative projects without technical interruptions.
Step 1: Choose the Right Drawing Tablet
When selecting a drawing tablet, it is important to consider the type of tablet, key features like pen pressure sensitivity, and compatibility with your device and operating system.
Understanding Different Types of Drawing Tablets
There are three main types of drawing tablets to be aware of:
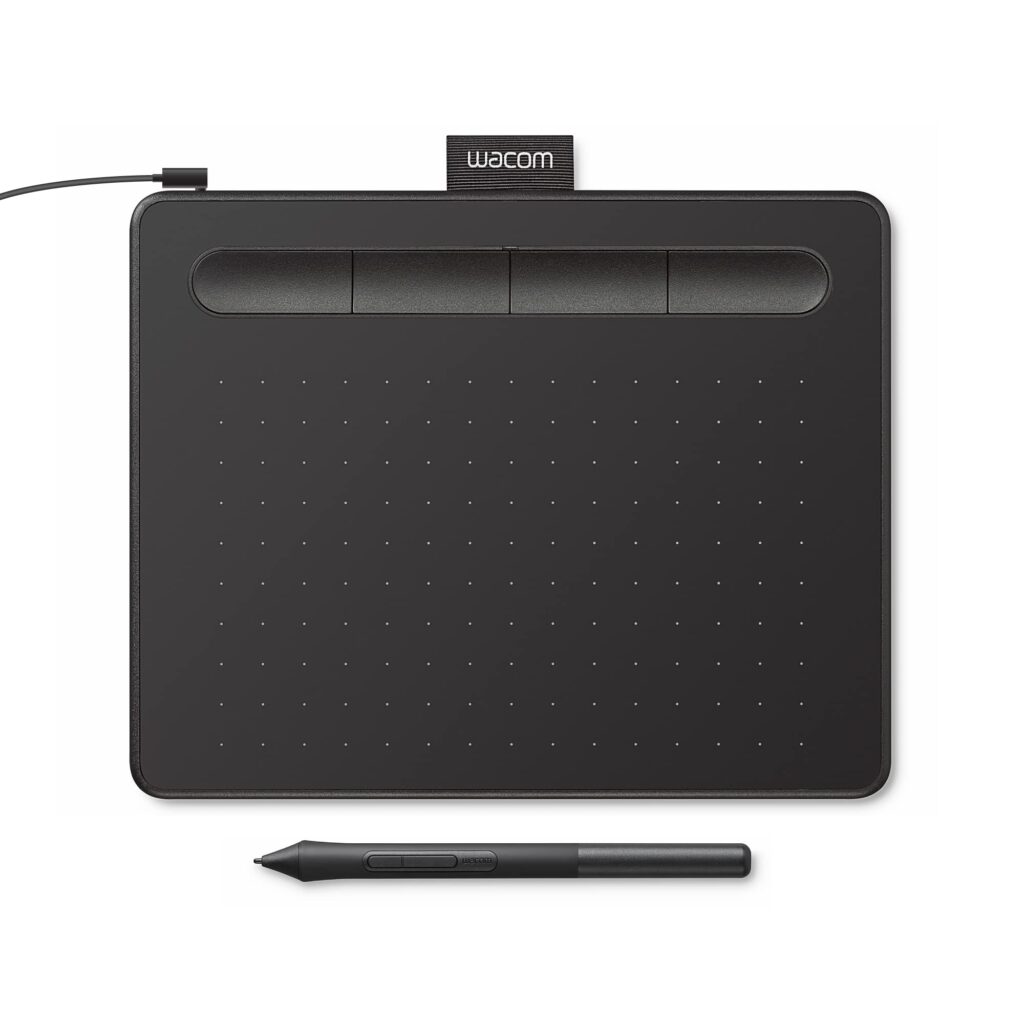
- Pen Tablets: These require an external monitor. They are generally more affordable.
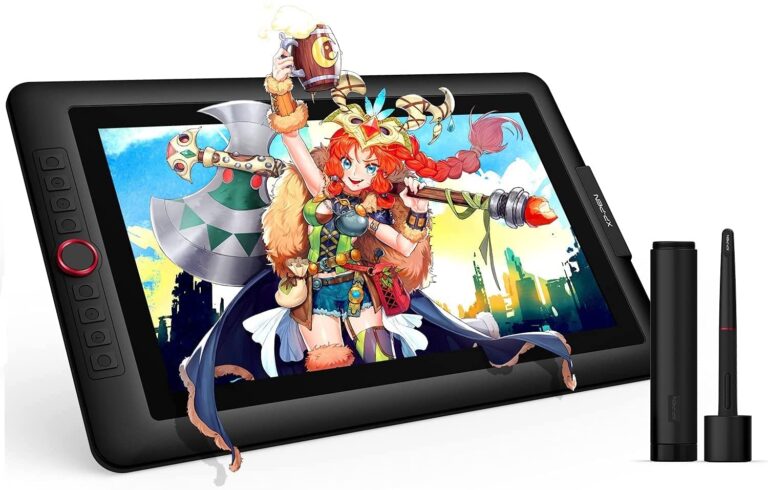
- Display Tablets: These have built-in screens, allowing users to draw directly on the screen.
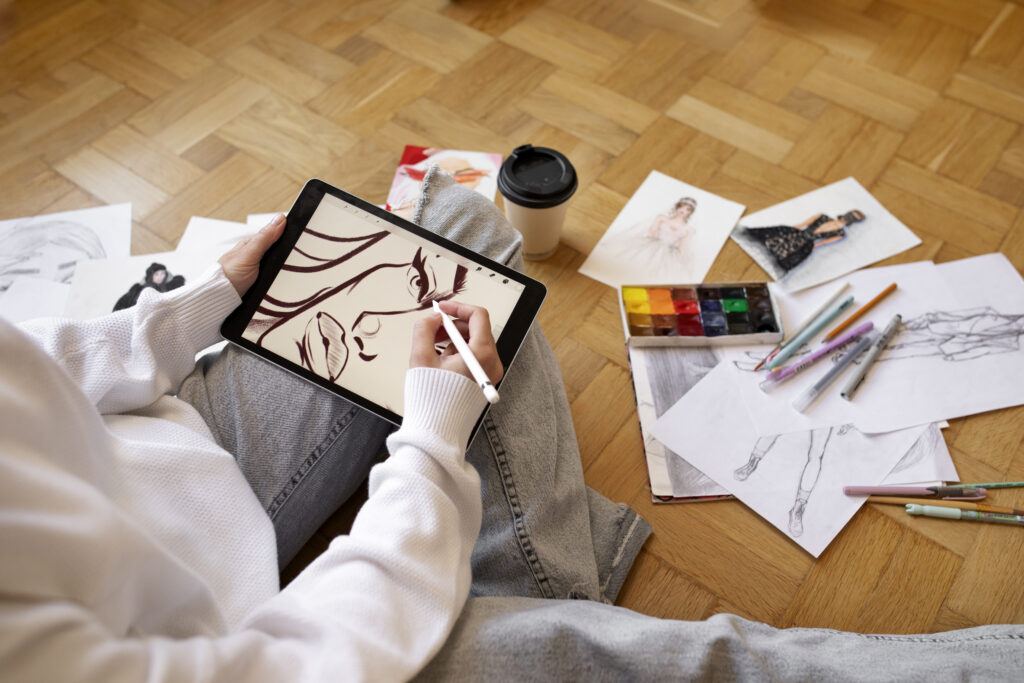
- Standalone Tablets: These are all-in-one devices like the iPad Pro, which do not need to be connected to a computer.
Each type has its own advantages. Pen tablets are cost-effective, display tablets provide an intuitive drawing experience, and standalone tablets offer portability.
Key Features to Look for in a Tablet
- Pressure Sensitivity: Look for models with at least 2048 levels of pressure sensitivity. Higher sensitivity allows for more precise and varied lines.
- Resolution: Aim for a tablet with a high-resolution display, measured in LPI (Lines Per Inch).
- Connectivity Options: Consider whether you need USB-C, USB cables, or wireless options.
- Pen Quality: Check if the pen feels comfortable and responds well.
- Additional Features: These may include touch capabilities, programmable buttons, and tilt recognition.
Device and Operating System Compatibility
Ensure the drawing tablet is compatible with your device and operating system:
- Operating Systems: Check if the tablet works with Windows, macOS, Android, Chrome OS, or iPadOS.
- Hardware Specifications: Verify the tablet is compatible with your computer’s CPU, GPU, and RAM specifications.
- Software Compatibility: Make sure it supports the creative software you use, like Adobe Photoshop or Illustrator.
Matching your drawing tablet with your current hardware and software ensures optimal performance. Always review the manufacturer’s specifications and customer reviews to confirm compatibility and reliability.
Step 2: Set Up Your Drawing Tablet
Properly setting up a drawing tablet involves several critical steps such as connecting the device to your computer, installing necessary drivers, and configuring the settings to optimize performance. These steps will ensure your device functions seamlessly with your operating system.
Initial Setup Process
Start by opening the package and checking the contents. Most drawing tablets come with the tablet itself, a stylus, a USB or wireless connection device, and possibly a driver installation CD or USB stick.
Ensure you have all the components. Refer to the instruction manual for any device-specific guidelines. It’s essential to connect and test the pieces before moving on to software installation.
Connecting the Tablet to Your Computer
Begin by deciding whether you will use a USB-C, traditional USB, or Bluetooth connection.
For USB connections, plug the cable into your computer and the tablet. If using Bluetooth, pair the tablet with your device through the operating system’s Bluetooth settings.
For Windows users, a prompt may appear, asking to install standard drivers; for Mac, initiate this step manually. Ensure your device is recognized before proceeding.
Installing Necessary Drivers
Go to the manufacturer’s website—such as Wacom or Huion—and download the latest drivers compatible with your operating system (Mac or Windows). Execute the downloaded file and follow on-screen instructions.
For Wacom Intuos, you may need to create a Wacom ID and register your tablet to access complimentary software. After installation, restarting your computer ensures that the drivers integrate properly with the system.
Configuring Tablet Settings for Optimal Use
Open the driver software, and navigate to the settings panel. Here, you can customize button functions, pen sensitivity, and screen mapping.
Adjust the sensitivity of the stylus to match your drawing style. Set up custom shortcuts for frequently used commands to improve workflow.
Review additional settings for multi-touch functionality and other advanced features, tailoring the tablet to your preferences. Regularly update the drivers and firmware to keep the tablet working smoothly.
Step 3: Customize Your Drawing Experience
Customizing your drawing tablet enhances the usability and precision of your work. Key customization options include adjusting pen pressure sensitivity, programming shortcut buttons, and utilizing the radial menu and ExpressKeys for optimal functionality.
Adjusting Pen Pressure Sensitivity
Pen pressure sensitivity affects line thickness and brush opacity. Users can customize this setting to achieve the desired stroke precision.
Most tablets come with software that allows adjusting the pressure curve. Open the tablet’s settings interface and locate the pen pressure adjustment section. Begin by testing various pressure levels on a preview area.
Adjust the sensitivity curve to match your drawing style. Lighter pressure settings result in greater responsiveness with minimal force, while heavier pressure settings require a firmer hand to achieve the same line thickness.
Experiment with these settings by drawing lines of varying pressure. Make sure to save the configuration for consistency across all drawing programs.
Programming Shortcut Buttons
Shortcut buttons on the stylus and tablet can be customized for quick access to frequently used tools. This reduces interruptions to your workflow and improves efficiency.
Access the settings menu and navigate to the shortcut buttons configuration. Commonly programmed actions include undo, redo, brush size adjustments, and tool switching.
Assign functions based on personal drawing habits. For example, if the brush tool is used frequently, assigning it to a button on the stylus can save time. Similarly, shortcuts for zooming in/out or panning can be highly effective when placed on the tablet’s buttons.
Test the configured buttons in your drawing software to ensure they perform as expected. Adjust as necessary to fine-tune their functionality.
Using the Radial Menu and ExpressKeys
The radial menu and ExpressKeys provide customizable on-screen controls for enhanced accessibility.
The radial menu often supports multiple functions within a circular interface. To set it up, open the tablet settings and navigate to the radial menu option. Assign essential actions to each segment of the menu. Functions could include selecting color palettes, moving layers, or changing brush types.
ExpressKeys on the tablet offer additional programmable buttons. These can be assigned to specific software commands like layer manipulation, canvas rotation, or saving files. This allows users to streamline their workflow without needing to rely on a keyboard.
Experiment with different configurations to find the setup that maximizes productivity and comfort, ensuring a seamless drawing experience.
Step 4: Choose Software and Applications for Digital Art
Choosing the right software and mastering features like layers, brushes, and undo/redo can significantly enhance your digital art workflow. This section provides a detailed look at these key topics.
Choosing the Right Applications
Selecting suitable drawing software is crucial. Procreate, Adobe Photoshop, Clip Studio Paint, and Autodesk Sketchbook are popular choices among artists.
- Procreate: Favored for its user-friendly interface and powerful toolset, making it ideal for beginners.
- Adobe Photoshop: Renowned for versatility, offering extensive brush customization and layer management.
- Clip Studio Paint: Excellent for comic and manga artists, with specialized features for line art and coloring.
- Autodesk Sketchbook: Aimed at professionals, it offers a robust set of tools while remaining intuitive.
Consider what suits your style and the complexity of your projects when choosing an app.
Benefits of Layering and Brush Features
Layers are fundamental in digital art, enabling complex compositions and easier editing. They allow artists to isolate and adjust different elements without affecting others.
- Layer Opacity: This feature permits transparency adjustments, perfect for adding subtle details.
- Blend Modes: Combine layers in unique ways to create effects.
- Brushes: Customizable brushes in apps like Adobe Photoshop and Procreate allow for varied textures and strokes.
- Brush Size and Opacity Control: Fine-tune these settings to achieve desired effects, whether sketching or painting.
Mastery of layers and brush features can lead to more refined and dynamic artwork.
Mastering Undo and Redo for Efficient Workflow
The undo and redo functions are indispensable for digital artists. They offer the freedom to experiment without the fear of irreversible mistakes.
- Keyboard Shortcuts: Learn shortcuts (e.g., Ctrl+Z for undo, Ctrl+Y for redo) for quick access.
- Undo History: Some apps like Clip Studio Paint provide an undo history, allowing you to revert to specific points.
- Efficiency: Frequent use of undo/redo aids in refining work and correcting errors effortlessly.
An efficient undo/redo process keeps the workflow smooth and helps maintain creative momentum.
Step 5: Boost Your Creativity and Productivity
A drawing tablet offers numerous features and techniques that can significantly boost your creative output and productivity. This section explores how to make the most of your drawing tablet to unlock its full potential.
Utilizing Tablet Features for Creative Projects
Drawing tablets come with various features designed to enhance creativity. Pressure sensitivity allows for dynamic control over line thickness and opacity, which is crucial for creating detailed illustrations. Customizable shortcut buttons make it easy to access frequently used tools, streamlining your workflow.
Brush settings offer versatility, enabling artists to switch between different brush types to find the perfect tool for their project. Tablets often come with pre-installed software such as Krita or Adobe Photoshop, where these features can be effectively utilized. Experimenting with these built-in features can lead to more polished and professional artwork.
To get started, it’s essential to configure your tablet settings to match your drawing style. This may include adjusting pen pressure sensitivity and calibration to improve accuracy and responsiveness. Taking the time to set up these features correctly can significantly enhance your productivity and creativity.
Exploring Digital Art Techniques for Beginners
Beginners can greatly benefit from practicing basic digital art techniques. Starting with simple sketches can help build confidence and familiarize new users with the tablet’s responsiveness. Gradually experimenting with layering techniques allows for more complex and refined artwork.
Digital art offers the advantage of undo and redo functions, making it easier to experiment without the fear of making irreversible mistakes. Utilizing different brushes and textures can expand creative possibilities, allowing beginners to mimic traditional art mediums like watercolor, charcoal, and oil paints.
Frequent practice is vital. Setting aside time to draw daily can help improve skills over time. New users should also explore online tutorials and community forums for tips and inspiration. Experimenting with different styles and techniques will encourage a deeper understanding of digital art, fostering creativity and enhancing productivity.
Bonus: Tablet Maintenance and Troubleshooting
Proper maintenance and troubleshooting of your drawing tablet involve steps like cleaning, replacing accessories, and solving common technical issues. This ensures longevity and optimal performance.
Cleaning Your Drawing Tablet
To clean your drawing tablet, start by disconnecting it from any power source. Use a soft, lint-free cloth slightly dampened with a mixture of water and isopropyl alcohol (70% solution is ideal). This helps to remove fingerprints, dust, and smudges effectively.
Avoid allowing moisture to seep into any openings. Never use abrasive materials or harsh chemicals, as these can damage the surface. Clean the stylus with the same solution but take care not to get moisture inside it. Regular cleaning helps in maintaining the smooth operation of your tablet.
Replacing Nibs and Accessories
The nibs of your stylus wear out over time, leading to reduced effectiveness. Most manufacturers provide extra nibs in the initial packaging. Check the instructions specific to your model for how to replace them. Generally, you pull out the old nib using a pair of tweezers and insert the new one by gently pushing it into the stylus.
Other accessories, such as cables and stands, might also need replacement due to wear and tear. Always opt for manufacturer-recommended accessories to ensure compatibility and performance. Regular maintenance of these components ensures that the overall user experience remains optimal.
Solving Common Tablet Issues
Troubleshooting common issues can often resolve problems without professional help. If your tablet is not responding, first check the drivers. Ensure that the latest versions are installed from the manufacturer’s website. Restart the tablet and the computer to reset any temporary issues.
If the stylus pressure is not functioning, recalibrate the tablet using the included software. Incorrect functionality may also be due to outdated firmware, so periodically check for updates. Calibration can usually be found in the tablet settings within the system’s control panel or settings menu.
By following these straightforward steps, many common tablet issues can be resolved, ensuring smooth and uninterrupted use of your drawing tablet.
Bonus: Community and Resources
Connecting with digital art communities and accessing various resources can greatly enhance your experience with a drawing tablet. These avenues offer support, inspiration, and valuable knowledge.
Learning from Digital Art Communities
Digital art communities are treasure troves of information and support. Platforms like Reddit, DeviantArt, and ArtStation provide spaces for artists to share their work, critique each other, and offer advice.
Experienced artists often post tips and respond to questions, making these communities incredibly useful for beginners.
Forums dedicated to specific tablet brands, such as Wacom, Huion, and XP-Pen, can be invaluable. Search engines like Google can quickly lead you to these niche forums.
For real-time interaction, joining a Zoom or Discord group dedicated to digital art can offer immediate feedback and tutorials.
Finding Inspirational Tutorials and Guides
Accessing quality tutorials and guides is essential for getting the most out of your drawing tablet. Websites like YouTube and DrawingHub frequently host in-depth tutorials ranging from basic setups to advanced techniques.
These tutorials often come with step-by-step guides that are easy to follow.
Review sites can also point you towards the most reliable and effective tutorials. Following tutorials from experienced artists ensures that the instructions are practical and useful.
For specific tools and software, official blogs and tutorials from Wacom and other tablet brands often provide the most accurate and updated information.
Using a combination of these resources will help you maximize your digital art potential.
Beginner’s Guide to Drawing Tablets
Are you confused about which drawing tablet is best for you? If so, check out our post on the Beginner’s Guide to Drawing Tablets. We evaluate several tablets that are ideal for those who are new to drawing tablets so that you can make an informed decision.
Frequently Asked Questions for How to Set Up a Drawing Tablet
Setting up a drawing tablet involves different procedures depending on the brand and model. Common concerns include installation steps, connectivity issues, and effective use.


“This guide on setting up a drawing tablet is incredibly helpful and well-written! As someone new to digital art, I found the step-by-step instructions clear and easy to follow. I appreciate how you’ve broken down the process, from installing drivers to adjusting settings for an optimal drawing experience. The troubleshooting tips were also a great addition, helping me avoid potential frustration. It’s evident that Drawing Tech World understands the needs of beginners and experienced artists alike. Thank you for creating such a valuable resource—I’ll definitely recommend this to anyone looking to get started with their drawing tablet!”
Thank you for your comment, Alan! So happy to hear that you found our guide helpful. If you have any questions as you get started creating digital art, please feel free to reach out. We are here to help.