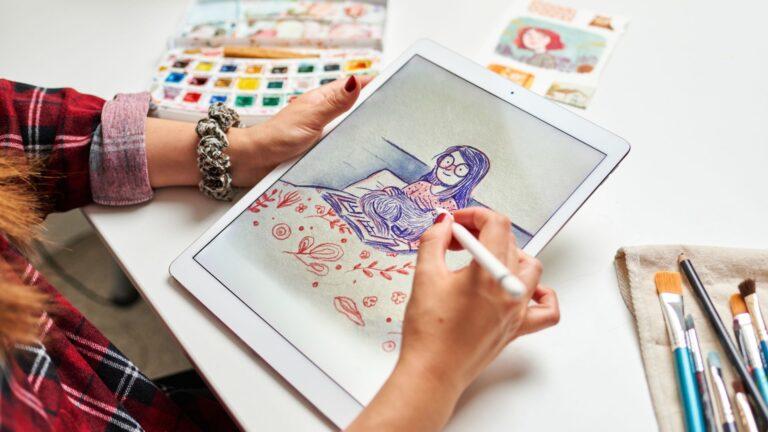
Learning how to draw people on Procreate can be straightforward and enjoyable with the right approach and tools. Procreate offers various features like stamp brushes for different body parts, making it easier for you to construct human figures with precision. By enabling the Symmetry Guide, you can achieve balanced proportions for the arms, legs, hands, and feet effortlessly.

When you start, creating a drawing guide is essential. This guide helps you outline the body structure using simple shapes and vectors. You can resize stamp brushes for the head, torso, limbs, and other body parts, which simplifies the process of sketching complete figures.
Aside from technical tools, practicing frequently and experimenting with different character poses will enhance your skills. Listening to calming music or following along with detailed Procreate tutorials can also make the drawing process more enjoyable and productive for you.
Step 1: Getting Started with Procreate
To begin drawing people on Procreate, you need to familiarize yourself with the app. This includes downloading Procreate, understanding its interface, and setting up your canvas.
Downloading Procreate
To get Procreate, head to the App Store on your iPad. Search for “Procreate” and purchase it. Procreate is a paid app, so ensure you have a valid payment method setup. Once purchased, download and install the app.
Procreate requires an iPad that supports the app with sufficient storage space for your artwork. Also, consider using an Apple Pencil for the best drawing experience as it offers enhanced pressure sensitivity and precision.
Understanding the Interface
Upon opening Procreate, you’ll first see the Gallery, which displays your saved works. Tap the + to create a new canvas. The interface includes various tools like the Brush Library, Layers Panel, Color Picker, and the Adjustments Menu.
Familiarize yourself with the Brush Library as it contains various brush types suitable for different drawing styles. The Layers Panel helps manage different elements of your drawing separately. Utilize the Color Picker for selecting and customizing colors. Lastly, the Adjustments Menu offers tools like opacity, blur, and color balance to help refine your artwork.
Setting up the Canvas
Setting up your canvas correctly is foundational. Tap the + in the Gallery screen to create a new canvas. You can choose from preset sizes or customize your own. A common size for digital art is 3000 x 3000 pixels with a resolution of 300 DPI.
Enable the Drawing Guide in the canvas settings for straight lines and symmetry. Procreate offers features like Symmetry, Grid, Isometric, and others. For figure drawing, the Symmetry Guide can be particularly useful as it helps maintain proportion and balance in your drawings. Adjust these settings according to your specific needs to create an efficient workspace tailored to your project.
Step 2: Basic Drawing Techniques
Drawing people in Procreate effectively involves mastering sketching fundamentals, utilizing layers, and strategically using various brushes.
Sketching Fundamentals
Begin with simple shapes to form the human anatomy. Start with basic geometric shapes like circles for the head and joints, and ovals or rectangles for the torso and limbs.
A light hand and smooth strokes help avoid harsh, permanent lines during initial sketching. Use Procreate’s Drawing Guide to maintain proportions and symmetry, ensuring balance in features and poses. Key tools include the pencil brush for loose sketches, followed by refining with more precise instruments.
Observe proportions carefully. For instance, the average adult body is about seven to eight heads tall. Break down complex parts such as hands and feet into basic shapes before detailing.
Using Layers
Leverage layers to maintain clean and hierarchical compositions for your drawings. Start with a base layer for rough sketches and progressively refine details on subsequent layers.
Naming and organizing layers can streamline your workflow. Use different layers for guidelines, sketches, inking, and coloring.
Adjusting layer opacity helps in viewing how underlying layers influence the current sketch. Merge or group layers when necessary to keep the project manageable.
Experiment with Blending Modes to achieve various effects, which can add depth and vibrancy to your drawings. Layers give you the flexibility to experiment and correct mistakes easily.
Leveraging Brushes
Procreate boasts a comprehensive set of brushes tailored for various drawing stages. Initially, the Pencil Brush is ideal for sketching and detailing outlines.
Switch to Inking Brushes for clean, bold lines that define your characters. These brushes provide precision and control, perfect for finalizing outlines.
Experiment with Shading Brushes to add depth and volume. Procreate’s blending options allow for smooth transitions and gradients.
Customize brushes by adjusting settings such as Size, Opacity, and Flow to suit your style. Import or create your brushes for unique textures and effects, enhancing your creative process.
Utilize the Stamp Brushes to quickly block out body parts and refine them, saving time and maintaining consistency.
Use brushes creatively to infuse personality and dynamism into your character drawings.
Step 3: Learn How to Draw Anatomy and Proportions
Understanding both human anatomy and proper proportions is essential for creating realistic and dynamic figures in Procreate. This involves knowing the fundamental body structure and the key ratios that ensure your figures appear lifelike.
Human Anatomy Basics
Begin by studying the basic structure of the human body. The skeletal framework provides the foundation for muscle placement and movement. Focus on major bones like the skull, spine, rib cage, pelvis, and limbs. Each part has a significant role in defining the figure’s shape and movement.
Pay attention to how muscles overlay the skeleton. Key muscle groups include the deltoids, biceps, triceps, pectorals, and quadriceps. Understanding these groups helps in drawing natural and dynamic poses. Use references and anatomy books to get a more in-depth understanding of muscle structure and how they affect body contours.
Proportion Guidelines
Proportion is crucial for achieving a balanced figure. Typically, the human body is measured in heads, with an average adult standing about 7.5 to 8 heads tall. This standard helps in maintaining consistent proportions across different poses.
- Head: 1 head tall
- Torso: 2 heads tall
- Legs: 4 heads tall
- Arms: About 3.5 heads, reaching mid-thigh when at rest
These measurements can vary. For example, children’s heads are larger compared to their bodies, while athletes might have more exaggerated upper body proportions. Use these guidelines as a starting point. Adjust them as required to fit the specific body type you are drawing.
Step 4: Drawing Poses and Movements
Drawing poses and movements in Procreate involves capturing dynamic stances and conveying motion within static images. Both aspects are crucial for creating lively and realistic illustrations.
Capturing Dynamic Poses
Start with gesture drawing to capture the essence of a pose. Gesture drawings focus on the general shape and movement rather than details. This helps prevent stiff and unnatural poses. Use simple shapes to map out the figure before adding details. For instance, ovals for heads, rectangles for torsos, and lines for limbs can help you quickly sketch out the pose.
Procreate’s Symmetry Guide feature can be beneficial when drawing mirrored body parts such as arms and legs. This guide simplifies the process, ensuring proportionality. Additionally, using character pose stamp brushes can help create a basic structure. Resize and position these stamps as needed, adjusting to best fit your composition.
Conveying Movement in Static Images
Conveying movement effectively in a static image requires an understanding of how the body moves. Pay attention to line of action, a vital component that runs through the character, indicating direction and force of movement. This helps make poses more dynamic.
Use flowing lines to draw attention to the direction of movement. Clothing and hair can also indicate motion. For example, a billowing skirt or hair flowing in the wind gives hints about the character’s movement. Adding subtle details like stretch and compression (e.g., a bent knee or an arm stretched out) further emphasizes motion.
Experiment with foreshortening, which creates the illusion of depth, making parts of the body seem closer or farther away. This technique is particularly effective for drawing movement-oriented poses.
Step 5: Facial Features and Expressions
Mastering the art of drawing facial features and expressions is crucial for creating compelling and realistic characters in Procreate. This section will guide you through essential steps for drawing eyes, noses, and mouths, as well as techniques for rendering expressive faces.
Drawing Eyes, Nose, and Mouth
Start with the eyes, as they are the most expressive part. Use the brush tool to outline the shape of each eye, considering the placement of the iris and pupil. Pay attention to eyelid shapes and the thickness of the lines.
Move to the nose. Noses vary significantly in shape and size, which can influence the character’s personality. Draw the bridge of the nose lightly, then outline the nostrils and the base.
For the mouth, sketch a simple horizontal guideline. Place the upper and lower lips relative to this line, adjusting for characters’ different expressions. Note how the lips curve and the spacing between them when open or closed.
Creating Expressive Faces
Expressions bring your characters to life. Start by identifying the emotion you want to convey—happiness, sadness, anger, etc. Adjust the shape and angles of the eyebrows to reflect this emotion.
Eyes play a crucial role. For example, narrowed eyes can indicate anger or suspicion, while wide-open eyes suggest surprise or fear. Modify the eyelids accordingly.
The mouth’s placement and curvature indicate various expressions. An uplifted curve shows happiness, while a downward curve indicates sadness. Ensure that the mouth’s corners and the shapes of the lips match the intended emotion.
Use subtle changes in the cheeks, jawline, and forehead to enhance expressiveness. Slight adjustments can significantly impact the realism and emotional portrayal of your characters.
Step 6: Shading and Coloring
Mastering shading and coloring in Procreate enhances the realism and depth of your drawings. This section will guide you through the basics of shading, understanding color theory, and effectively applying colors and textures using Procreate tools.
Basics of Shading
Shading creates depth and dimension in your drawings.
Start with a base layer that will act as your foundation.
Use a smudging brush paired with the appropriate medium. For instance, smudging a watercolor stroke will differ from a pencil stroke. Experiment with different brushes to find the best combination.
Apply light source logic to determine where shadows and highlights should appear on your character. Consistency in this approach will bring a sense of realism to your work.
Color Theory
Color theory is essential for creating visually appealing artwork.
Use the color wheel in Procreate to choose harmonious colors. This includes understanding concepts like complementary, analogous, and triadic color schemes.
Skin tone palettes can help in picking the right shades for your characters. Adjust the hue, saturation, and brightness to match the desired effect.
Practice blending colors to create smooth transitions and gradients. This will make your characters appear more lifelike and three-dimensional.
Applying Colors and Textures
After choosing your colors, it’s time to apply them to your characters.
Hide any guide and sketch layers to focus solely on the coloring process.
Use Procreate’s brushes to apply both base colors and finer details. The Studio Ink brush and Soft Airbrush are popular choices for blending and adding texture.
Carefully layer colors to build up texture and detail. Use different opacity settings and layer modes to achieve the desired effect.
Remember to lock alpha on your layers to ensure coloring stays within the lines and maintains clean edges. Experiment with overlay and multiply modes to enhance shading and texture.
Step 7: Add Your Own Finishing Touches
When you’ve completed the main components of your drawing, it’s time to focus on refining your work, enhancing the background, and preparing your art for export. Each of these steps ensures your artwork is polished and ready for display.
Refining Details
Pay attention to the finer aspects of your drawing. Use Procreate’s Smudge tool to blend colors smoothly, creating a more cohesive look. Zoom in to correct any minor imperfections.
Adjust line weights to emphasize different parts of your drawing. Make sure to use varying brush sizes for subtle changes. Add highlights and shadows to define your characters better, giving them depth and dimension.
Layers are your friend here. Keep details on separate layers for easy adjustments. Don’t forget to use the eraser lightly to clean up edges or any missteps.
Adding Backgrounds
A well-chosen background sets the stage for your characters. Start with a new layer below your main subject. This allows you to work on the background without disrupting your main artwork.
Consider the context of your scene. A simple gradient or a more intricate scenery can both be effective. Use Procreate’s brushes to add texture and elements like trees, buildings, or abstract shapes.
You can also use Procreate’s Shape and QuickShape tools to create geometric backgrounds. Experiment with different color palettes to find one that complements your characters and matches the mood of your piece.
Exporting Your Art
When you’re satisfied with the final product, it’s crucial to export your artwork correctly. Procreate offers multiple file formats like JPEG, PNG, and PSD. Each has its purpose: PNGs are best for web use due to transparency support.
Access the Share menu by tapping the wrench icon. Choose your desired format and resolution settings. For printing, ensure you export at a higher DPI (300 or more).
Store your files in a safe place. Consider backing up your project to cloud storage. Maintain both editable files and flattened versions for different future uses.
Beginner’s Guide to Procreate
Our Beginner’s Guide to Procreate is the ultimate resource to kickstart your digital art journey. It covers everything from the basics of navigating the app to advanced techniques for creating stunning artwork so that you can not only get off to a strong start but gain confidence quickly. Dive in and unleash your creativity with Procreate!
Frequently Asked Questions for How to Draw People on Procreate
Drawing people in Procreate can be simplified into manageable steps and techniques. By following structured tutorials and practicing specific exercises, you can enhance your skills and creativity.