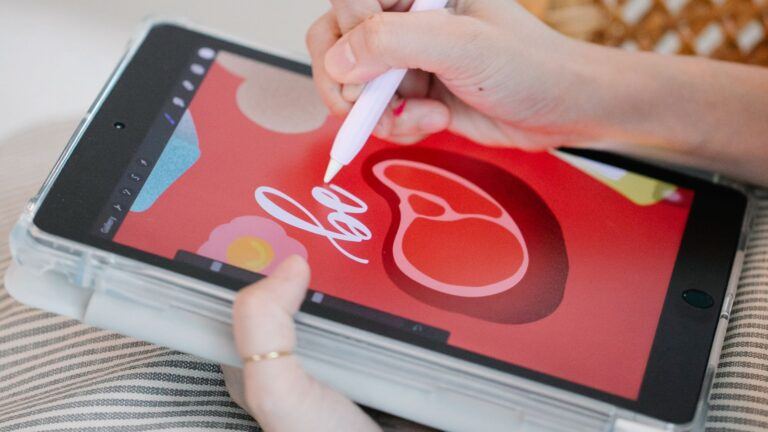
Procreate’s selection tool is a powerful feature that can greatly enhance your digital art process. By mastering the Procreate Select Tool, you can isolate specific areas of your artwork to edit, transform, or apply effects with precision. This ability to manipulate chosen sections unlocks endless creative possibilities, allowing you to experiment with different techniques without affecting the entire piece.

Whether you’re defining areas with freehand selection, using polygonal lines, or crafting intricate shapes by combining both methods, the selection tool offers flexibility and control. This makes it an essential asset for artists looking to refine their workflow and enhance the details in their work. You can easily reset your selections if needed, providing a fresh starting point for ongoing art projects.
The selection tool is also designed to align with various artistic needs, whether you’re editing a character’s face or defining a section for color adjustments. This direct and efficient process saves time and supports a more focused approach to digital art, catering to both beginners and seasoned artists looking to optimize their creative endeavors.
Step 1: Getting Started with Procreate
Procreate is a powerful digital art app designed for the iPad, offering a range of tools for artists. Among these tools, the Select Tool stands out for its versatility in editing artwork efficiently.
Understanding the Select Tool
The Select Tool in Procreate is essential for isolating specific areas in your artwork. This tool allows you to focus on certain parts of your project, streamlining your workflow.
Functions of the Select Tool:
- Automatic Selection: Quickly selects areas based on color or tone differences.
- Freehand Selection: Offers a more intuitive experience by letting you hand-draw around objects.
These modes provide flexibility, accommodating both precise refinements and quick adjustments. Mastering these options can significantly enhance your editing capabilities in Procreate.
Accessing the Select Tool
To access the Select Tool, open Procreate and look for the icon resembling a “S-shaped ribbon” at the top of the interface. Tapping this icon brings up the selection options. From there:
- Choose between Rectangle, Ellipse, Polyline, or Freehand methods.
- Automatic mode can be activated with a single tap, instantly selecting areas.
Familiarizing yourself with these options ensures that you can swiftly modify parts of your artwork, leading to a more productive creative process. This accessibility makes the Select Tool a vital component of your Procreate experience.
Step 2: Selection Basics
The Procreate Selection Tool offers a versatile way to isolate parts of your artwork for various modifications. Understanding how to effectively create, adjust, and manipulate selections enhances your workflow and creative expression.
Making Your First Selection
To begin selecting in Procreate, access the selection tool by tapping the “S” icon in your toolbar. Choose from multiple selection modes: Freehand, Rectangle, Ellipse, and Automatic, each suited for different tasks. Freehand allows for drawing custom selection shapes, while Rectangle and Ellipse are best for geometric areas.
Automatic mode selects areas based on color similarity, which is incredibly useful for quick selections. Practice using each mode to understand how they differ and find the tool best suited for your needs. Familiarity with these options ensures flexibility in your selection process.
Adjusting Selection Edges
After making a selection, you can refine the edges to improve precision. The Feather option softens the edge, creating a gradual transition that blends seamlessly with surrounding areas. Toggle the Expand or Contract functions to fine-tune your selection size without needing to redo it from scratch.
Modify edge sharpness using these features to achieve the desired effect, whether cutting sharp lines or creating subtle gradients. Consistent practice with adjusting edges refines your ability to make precise selections that suit your artistic vision.
Moving and Resizing Selections
Once a selection is made, you can move or resize it for further manipulation. To adjust its position, simply drag your selection to the desired location. For resizing, pinch or stretch the selection using multi-touch gestures, ensuring it scales proportionally as needed.
The Transform options also allow for intricate adjustments, providing rotation and flip tools. Experiment with these transformations to understand how selections can be dynamic components of your art. When moving and resizing selections, ensure that changes contribute positively to the composition’s balance and integrity.
Step 3: Practice Advanced Selection Techniques
Mastering advanced selection techniques in Procreate allows you to create precise and complex designs. Enhance your digital artwork by utilizing specific selection methods that offer control and flexibility.
Using QuickShape with Selections
QuickShape is a powerful tool in Procreate that simplifies creating perfect geometric shapes. While making a selection, draw a rough shape and hold your stylus to let QuickShape transform it into a perfect line, circle, or polygon. This method is beneficial for clean, precise designs without needing extensive manual corrections.
You can adjust the shape after it’s been made by dragging the nodes that appear in corners or midpoints. Using QuickShape during selection saves time and ensures uniformity in your designs, which is crucial for layouts requiring consistency.
Adding to and Subtracting from Selections
Refining your selections is essential for detailed work. In Procreate, you can add to an existing selection by choosing the Add option. This allows you to expand your selection to include additional areas in your artwork. Conversely, the Subtract mode lets you remove parts of the selection you no longer need.
Toggle between these modes quickly through the menu, enabling seamless adjustments as you refine your selection. Using these techniques helps prevent the need for starting over, saving you time and effort while keeping your focus on creativity.
Selecting by Color and Threshold
Selecting areas based on color is an effective way to isolate parts of your artwork for modification. In Procreate, use the Color Selection tool, which allows you to select areas with similar colors. Adjust the threshold by dragging your finger left or right to increase or decrease the range of colors selected.
This method is excellent for making swift adjustments without affecting the rest of your piece. By understanding how threshold adjustments impact color selection, you can achieve the desired level of precision in your digital art projects.
Step 4: Learn Selection Actions
In Procreate, the selection tool allows you to manipulate specific areas of your artwork with precision. You can transform selected areas, invert existing selections, or adjust the edges for better integration.
Transforming Selected Areas
Once you’ve made a selection, you can transform it in several ways. Tap the Transform tool, which appears when a selection is active, to access various transformation options. You can move, rotate, scale, or distort the selected area. Use Uniform mode for proportional scaling, and Freeform for more flexibility. The snapping feature ensures precision by aligning elements, and you can disable this if you prefer free movement. These tools provide control over how you manipulate your selections, enabling dynamic changes to your artwork.
Inverting Selections
Inverting a selection is a crucial feature for focusing on areas not initially selected. To invert, use the selection tool’s options and tap Invert Selection. This action flips the selection, highlighting everything outside your original choice. This option is valuable for protecting specific areas while editing others. It’s particularly useful in complex compositions where you need to apply effects to everything but a chosen section. Mastering inversion allows for more versatile control over your digital canvas, ensuring precision in modifications and applications.
Feathering and Refining Edges
Feathering helps soften the edges of your selection for smoother transitions. In the selection options, locate and adjust the Feather slider to achieve the desired softness. Refining edges ensures your selection blends seamlessly with the surrounding artwork. After feathering, you might need to adjust the edge strength for a cleaner look. Refine edges using tools like Smooth, which reduces jagged lines, or Contrast, to emphasize the selection border. This meticulous adjustment helps integrate edited elements naturally into the overall composition.
Step 5: Working with Layers and Selections
In Procreate, mastering layers and selections opens up a range of possibilities for your digital artworks. You can isolate individual layers to fine-tune specific areas and combine selections across multiple layers for complex adjustments.
Isolating Layers for Selection
To streamline your workflow, isolate specific layers when working with selections. Begin by opening the Layers Panel and identifying the target layer. Tapping on it will select the layer, and you’ll access only the contents of that layer, making precise adjustments easier.
Use Procreate’s selection tools to further refine. The lasso tool, for instance, enables you to draw around specific areas, isolating sections for detailed editing. Similarly, a rectangular or freehand selection can be employed to enhance precision. Isolating layers combined with selective adjustments gives you greater control over artistic details.
Combining Selections Across Layers
When your artwork involves multiple layers, combining selections is key to unifying edits. Start by selecting the primary layer you wish to edit in the Layers Panel. Use the selection tool to choose areas. Then, while keeping the selection active, switch to other layers and incorporate new selections.
This technique is especially useful for intricate designs or when needing uniformity across different elements of your work. Tip: Maintain consistency by using similar selection shapes across layers, or utilize the copy-paste feature to replicate selections effectively. By mastering this, complex projects become more manageable, delivering a more cohesive finished piece.
Step 6: Master Tips and Tricks for Efficient Use
Enhance your workflow in Procreate by mastering shortcuts, effectively storing selections, and solving common selection challenges. These tips focus on maximizing your efficiency with the selection tool, allowing for smooth and intuitive editing.
Shortcut Gestures for the Select Tool
In Procreate, leveraging shortcut gestures can significantly speed up your selection process. Use two-finger taps to quickly undo actions or activate QuickMenu for frequently used tools, streamlining your work. Double-tapping the selection handles can reset the transformations, giving you quick control adjustments.
Activate the ‘S’ icon for selection and practice gestures to gain muscle memory, which enhances speed. Custom gestures allow you to tailor shortcuts specific to your needs, improving both comfort and efficiency in handling the select tool. These techniques help maintain your creative flow with minimal interruptions.
Storing and Reusing Selections
Procreate allows you to store and reuse selections, a key feature for projects requiring repeated adjustments to the same area. Use layers and alpha lock to save selected regions, making it easy to revisit portions without re-selecting manually.
Save selections by creating a new layer and filling it with a solid color; this layer serves as a selection mask. Utilize the Select tool’s Copy and Paste function to transfer selections between canvases, handy for projects spanning multiple files. This method significantly reduces time spent on repetitive tasks, letting you focus more on creative decisions.
Troubleshooting Common Selection Issues
Selecting areas precisely can sometimes pose challenges in Procreate. If you encounter issues with selections not adhering to desired boundaries, adjust the selection threshold by sliding after tapping your selection. This ensures tighter control over what parts of your artwork are selected.
When the selection tool lags or behaves unexpectedly, ensure your app is up to date, as updates often resolve existing bugs. Clear your app cache if performance issues persist, which can improve responsiveness. Being prepared to troubleshoot empowers you to handle obstacles confidently and maintains the efficiency of your creative process.
Step 7: Integrate Selections into Your Workflow
Incorporating the selection tool effectively in Procreate can significantly boost your efficiency. By isolating specific parts of your artwork, you can apply changes without affecting the rest of your project. This flexibility lets you experiment with different elements, such as colors or textures, more freely.
When using selections, it’s important to choose the right tool for your task. Procreate offers options like Automatic, Freehand, and Polygonal. Each tool serves distinct purposes, so understanding their strengths will help you execute tasks more precisely.
Consider saving your selections if they require frequent modifications. This feature allows you to revisit specific areas without recreating selections each time. It’s a simple step that can save you significant time over multiple editing sessions.
Use layers in conjunction with selections for greater control. By creating edits on separate layers, you’re able to make changes without fear of permanently altering the original artwork. This non-destructive approach provides assurance and simplifies trial and error.
Remember that selections also enable you to add complex effects, like shadows or highlights, enhancing the visual depth of your creations. By selecting the area for these effects carefully, you ensure they integrate seamlessly into your design.
Bonus: Practice Exercises to Master the Select Tool
To enhance your proficiency with the Procreate select tool, engaging in regular practice exercises is essential. Start by creating art projects that require you to use the select tool in different ways.
Experiment with layering. Create a new layer and try selecting and modifying specific areas, such as adding highlights or shadows. This helps you understand how selections interact with different layers.
- Exercise 1: Choose an area and use the select tool to color it differently. This simple exercise aids in gaining control over your selections.
- Exercise 2: Practice isolating complex shapes using freehand selection. Trace around intricate designs to improve precision.
Work with the transform feature by selecting parts of your artwork and resizing them. This helps you learn to adjust selections without affecting the whole canvas.
Use regular practice sessions to tackle specific areas of improvement. Identify any difficulties you face with the tool and create exercises to address them.
A helpful exercise is to replicate your favorite artwork and practice selecting various elements to understand how selections can be used creatively.
Take advantage of Procreate’s tutorials or even online videos to guide your practice, enabling you to refine techniques and resolve any issues encountered.
Remember, consistent practice is key to mastering the Procreate select tool. Embrace mistakes as learning opportunities and gradually develop your skills with dedication and creativity.
Beginner’s Guide to Procreate
Our Beginner’s Guide to Procreate is the ultimate resource to kickstart your digital art journey. It covers everything from the basics of navigating the app to advanced techniques for creating stunning artwork so that you can not only get off to a strong start but gain confidence quickly. Dive in and unleash your creativity with Procreate!
Frequently Asked Questions for the Procreate Select Tool
When using the Procreate selection tool, you might encounter some common challenges related to precision and functionality. Here are key questions and solutions that can enhance your experience and address frequent issues.
