Diving into the world of digital art can be overwhelming, especially when you’re trying to figure out which Procreate tools will help bring your creative vision to life. If you’re using Procreate on your iPad, you’ve already made a fantastic choice for your digital art journey. The right brushes and tools can completely transform your workflow and artistic style.
Choosing the right Procreate tools can make the difference between feeling limited in your artistic expression and having the freedom to create exactly what you envision. Whether you’re sketching, painting, or adding fine details to your work, having a versatile collection of brushes is essential for any digital artist.
In this article, we’ll explore the Top 18 Procreate Tools that professional digital artists swear by. From textured brushes that mimic traditional media to specialized tools for adding unique effects, you’ll discover options that can elevate your artwork and streamline your creative process. Many of these Procreate tools have become favorites in the digital art community for good reason!
Brushes and Painting Procreate Tools
Procreate’s heart lies in its robust set of brushes and painting tools that give digital artists incredible creative freedom. These tools combine precision with artistic expression, allowing you to create artwork that ranges from sketchy illustrations to polished masterpieces.
1. QuickShape Tool
The QuickShape tool is a game-changer when you need perfect geometric shapes in your artwork. Simply draw a rough circle, square, triangle, or line and hold your pencil down at the end – Procreate magically transforms your imperfect sketch into a clean, precise shape.
You can adjust these shapes by dragging the control points or use the edit menu to perfect the proportions. This tool is especially handy for architectural elements, UI design, or creating symmetrical patterns.
Want to create multiple perfectly spaced shapes? The QuickShape tool lets you duplicate shapes while maintaining consistent sizing. It’s also great for creating speech bubbles, diagram elements, or frame borders without needing to switch to vector tools.
2. StreamLine Feature
Ever struggled with wobbly lines? The StreamLine feature smooths out your brush strokes in real-time, giving you confidence even if you don’t have the steadiest hand.
You can adjust the StreamLine intensity based on your needs – higher values create super smooth lines perfect for inking comics or lettering, while lower values retain some natural variation for more organic drawings.
This feature works with nearly all brushes, making it versatile for different art styles. Many digital artists use higher StreamLine settings when doing detailed linework, then reduce it when adding textured elements or sketchy details.
Pro tip: Combine StreamLine with the monoline brush for perfect vector-like illustrations without leaving Procreate.
3. Brush Library Customization Tools
Procreate comes loaded with fantastic default brushes, but the real magic happens when you customize your library. You can download brushes from artists and platforms like Gumroad, adjust settings of existing brushes, or create your own from scratch.
The “Sketching Brush” and “Inking Brush” are popular defaults, but don’t overlook specialty options like the “Grainy Pastel,” “Charcoal,” and “Oil Paint” brushes for adding depth and texture to landscapes.
Creating brush sets for different projects helps streamline your workflow. Try organizing brushes by project type or art style for quick access.
You can even import Photoshop brushes (.abr files) or share your custom creations with other artists.
4. Dynamic Brushes
Dynamic brushes respond to pressure, tilt, and speed, mimicking traditional media in impressive ways. The “Turpentine” brush, for example, creates realistic paint effects that blend naturally with existing colors.
Experiment with pressure sensitivity to create tapered lines or varied textures. Tilt your Apple Pencil to access different brush angles, just like you would with real pastels or charcoal.
The “Soft Brush” offers beautiful blending capabilities, while “Studio Pen” and “Mono Line” provide clean linework for illustrations and lettering projects.
For texture enthusiasts, try the specialty dynamic brushes that simulate watercolor blooms, dried brush effects, or even spray paint splatters. These tools shine when creating atmospheric backgrounds or textured character designs.
5. Smudge Tool
The Smudge tool is your digital blending champion, allowing you to push colors together without the mess of traditional media. It works particularly well for creating soft transitions in portraits or blending background elements.
Try different smudge brushes for various effects – the default smudge can be too smooth, but specialty smudge brushes can mimic oils, watercolors, or even colored pencil blending.
A light touch with the smudge tool helps maintain texture while blending colors. Too heavy, and you’ll lose the character of your brushwork.
Digital painters often use the smudge tool with a low opacity setting to gently push colors at edges rather than completely blending them. This technique preserves more of the original brushstrokes while still creating cohesive transitions.
Layers and Blending Modes
Layers and blending modes form the backbone of professional artwork in Procreate, giving you incredible control over your compositions. These tools let you organize elements, make non-destructive edits, and create stunning visual effects that would be impossible in traditional media.
6. Layer Management Procreate Tools
Layers in Procreate work like transparent sheets stacked on top of each other, allowing you to work on different elements separately. You can create up to 200+ layers depending on your canvas size and iPad model.
To stay organized, use layer groups by swiping right on a layer and tapping “Group.” This keeps related elements together, especially useful for complex illustrations.
Need to rearrange? Simply drag layers up or down to change their stacking order. The higher a layer sits in the stack, the more visible it is in your composition.
Pro tip: Double-tap a layer to access quick options like “Select,” “Alpha Lock,” and “Clear.” You can also adjust layer opacity by tapping a layer and using the slider that appears.
7. Alpha Lock and Clipping Mask Procreate Tools
Alpha Lock restricts your painting to existing pixels on a layer, perfect for coloring inside the lines. Toggle it by swiping right on a layer and tapping “Alpha Lock.”
Clipping Masks allow you to use one layer’s content to define the visible areas of another. To create one, swipe right on a layer and select “Clipping Mask.” This technique works great for adding texture or shading to specific shapes.
The difference? Alpha Lock confines changes to existing content on a single layer, while Clipping Masks let you add content on a separate layer that only appears within the shape of the base layer.
Try using Alpha Lock for adding highlights and shadows to objects, and Clipping Masks for non-destructive texturing and color adjustments.
8. Blend Mode Effects
Blend modes determine how layers interact with those beneath them, creating effects from subtle color shifts to dramatic lighting. Access them by tapping the “N” (Normal) next to any layer.
Multiply darkens your image and works wonderfully for shadows and depth. Screen lightens everything, perfect for glows and highlights. Overlay combines both effects for enhanced contrast.
For digital painting, try Color Dodge to create vibrant light effects or Soft Light for gentle color adjustments. Color and Hue modes allow you to recolor artwork while preserving shadows and highlights.
Experiment with different opacity levels when using blend modes. A Multiply layer at 20% opacity creates subtle shadows, while 100% produces deep, rich darkening effects.
Color and Swatches
Mastering color in Procreate can take your digital art to new heights. The app offers powerful tools for selecting, organizing, and applying colors that streamline your workflow.
9. ColorDrop Feature
The ColorDrop tool in Procreate is a game-changer for quick coloring. You can simply drag a color from your palette and drop it onto your canvas to fill an area.
Unlike traditional fill tools, ColorDrop is smart enough to detect edges and boundaries in your artwork. You can adjust the threshold with a simple slide of your finger to control how the color fills.
What makes this tool extra handy is that it works with layers too. You can drop color onto a specific layer without affecting others, making it perfect for complex illustrations.
Pro tip: Double-tap the ColorDrop tool to access the Reference threshold, which gives you even more precise control over your fills.
10. Create and Share Palettes
Building your own color palettes in Procreate is surprisingly simple. You can create a new palette by tapping the “+” in the Colors panel and then add colors one by one.
Procreate lets you extract colors directly from your reference images. Just import an image and use the eyedropper tool to sample colors you love.
You can organize your palettes by project or style, making it easier to maintain consistency across your artwork. Each palette can hold up to 30 colors, giving you plenty of options.
Sharing palettes with other artists is just a few taps away. Export your custom palette as a .swatches file and send it to friends or even sell it online for other digital artists to use.
Selection and Transformation Tools
Procreate’s selection and transformation tools offer precise control over your artwork, allowing you to isolate specific areas and manipulate them with ease. These powerful features help you refine your compositions and make adjustments without affecting the entire canvas.
11. Freehand Selection Tool
The Freehand Selection tool lets you isolate specific areas of your artwork for editing. You can access it by tapping the wrench icon and then selecting the “Selection” option.
Procreate offers several selection modes including Freehand, Rectangle, and Ellipse. The Freehand option gives you complete control to draw around any shape you want to select.
Once you’ve made a selection, you can invert it by tapping “Invert” in the selection menu. This is super helpful when you want to work on everything except the selected area.
You can also add to or subtract from your selection using the “Add” and “Subtract” options. This makes creating complex selections much easier than starting over each time.
The “Feather” slider allows you to soften the edges of your selection, creating more natural-looking edits when you apply color or effects to the selected area.
12. Transform Tool
The Transform tool (represented by the arrow icon) lets you resize, rotate, warp, and distort your selections or layers. It’s essential for refining your compositions and making precise adjustments.
When you activate the Transform tool on a selection, a bounding box appears with handles that you can drag to resize your content. Hold down on the screen to access additional options like Scale, Distort, and Warp.
Pro tip: Use the “Maintain Aspect Ratio” option to resize your selection without distortion. This is especially important when working with text or recognizable objects.
The “Snapping” feature helps align your transformed elements to the canvas grid or other layers. This makes creating perfectly aligned compositions much easier.
Procreate’s transform tool also includes the “Interpolation” option. Choosing “Nearest Neighbor” can help maintain crisp edges when resizing pixel art or text, preventing the fuzzy look that typically occurs during transformations.
Canvas and Resolution
Setting up the right canvas size and resolution in Procreate is crucial for creating professional digital art. Your choices here will impact both the quality of your work and how versatile your finished pieces will be across different platforms.
13. Custom Canvas Sizes
Most digital artists working in Procreate typically use canvas sizes of 3000×3000 pixels or larger for general artwork. This size gives you a good balance between detail and manageable file size. If you’re creating art primarily for Instagram, you don’t need massive canvases, but for print work, you’ll want to think bigger.
For print projects, working at 350 DPI is standard, though you might go higher for smaller pieces under 5×5 inches. Many artists work in the 12×18 inch range for larger pieces. Comic artists often use specific dimensions like 9×13 inches for traditional page formats.
You can easily create custom canvases in Procreate by tapping the + icon in the gallery and selecting “Create Custom Size.” This allows you to set exact dimensions and DPI based on your specific needs.
Remember that larger canvases with higher resolutions will use more layers and potentially slow down your device. It’s always smart to consider your final output needs before starting a new project.
Guides and Rulers
Procreate’s guides and rulers are essential tools that help create precise, symmetrical, and properly proportioned artwork. These built-in features eliminate the guesswork when you need perfect alignment or consistent perspective in your digital creations.
14. 2D Grids and Isometric Guides
When you need to create precise technical drawings or maintain perfect perspective, Procreate’s 2D grid system is your best friend. To activate it, tap the wrench icon, select Canvas, and toggle on Drawing Guide. Tap Edit Drawing Guide to customize your grid spacing and opacity to suit your specific needs.
For creating three-dimensional objects with accurate depth, the isometric guide is incredibly useful. This specialized grid helps you maintain consistent angles when drawing objects that extend into 3D space. Many architects and game designers rely on these guides for creating accurate environmental concepts.
You can also save your custom guide setups for future use! Just create your perfect grid configuration, then tap “Save” in the Drawing Guide menu. This saves tons of time when you frequently work with specific grid patterns.
Drawing to scale becomes much easier with these tools. Whether you’re designing UI elements that need exact measurements or creating architectural illustrations, the grid system ensures your proportions remain consistent throughout your artwork.
Gesture Controls and Shortcuts
Procreate’s powerful gesture control system keeps your focus on the canvas instead of hunting through menus. These intuitive movements and taps significantly speed up your workflow and make creating digital art more seamless.
15. Customizable Gestures
Procreate offers a comprehensive set of gesture controls that streamline your digital art creation. The two-finger tap for undo is perhaps the most time-saving gesture you’ll use constantly. Three fingers tap to redo when you change your mind.
You can pinch to zoom in and out of your artwork with incredible precision. Two-finger rotation allows you to adjust your canvas position for better drawing angles without awkwardly turning your iPad.
For selection tasks, touch and hold activates the selection tool, while a quick tap selects layers. When you need perfect shapes, the QuickShape feature transforms your rough lines into precise geometrical forms by simply holding your pencil down after drawing.
These gestures are customizable in Settings, so you can tailor them to match your specific workflow needs.
16. QuickMenu Access
The QuickMenu feature puts your favorite tools just a tap away, eliminating the need to navigate through multiple menus. Activate it with a customizable gesture (typically a touch and hold in the corner) to instantly access frequently used actions.
You can personalize this menu with the tools and actions you use most. Add brush adjustments, layer controls, or transform tools for immediate access without interrupting your creative flow.
The sidebar can be quickly moved to accommodate left or right-handed artists with a simple drag. This flexibility ensures the interface never gets in the way of your creativity.
Copy and paste operations become effortless through the QuickMenu, letting you duplicate elements across your artwork without multiple steps. By mastering these shortcuts, you’ll dramatically reduce the time spent on technical aspects and focus more on your artistic expression.
Animation Assist
Procreate’s Animation Assist transforms your iPad into a portable animation studio, making frame-by-frame animation accessible for artists at any skill level. This powerful tool simplifies the animation process while giving you professional-level control over your moving creations.
17. Procreate Tools for Creating Simple Animations
To start animating in Procreate, open the Actions menu and toggle on Animation Assist. You’ll immediately see a new interface with timeline controls at the bottom of your screen.
Add new frames by tapping the plus button, and draw directly on each frame while using the onion skinning feature to see your previous drawings as guides.
You can adjust the frames per second (FPS) to control how fast your animation plays. Lower FPS creates a choppier look, while higher numbers create smoother motion.
The timeline lets you rearrange frames by dragging them into different positions. You can also duplicate frames when you need similar consecutive drawings or delete frames that aren’t working.
Want to test your animation? Use the play button to preview how it looks. When you’re satisfied, export your creation as a GIF, MP4, or HEVC file to share with others.
Time-Lapse Recording
Procreate’s time-lapse recording feature automatically captures your entire creative process, allowing you to replay your artwork from start to finish. This powerful tool works silently in the background while you draw.
18. Documenting Creative Process
Time-lapse recording in Procreate captures every brushstroke and edit you make without any manual setup. Unlike other apps that require separate screen recording software, this feature is built right into Procreate and turned on by default.
When you finish your artwork, you can access a perfectly rendered video showing your creation from blank canvas to final piece. You can adjust the playback speed to create quick snippets for social media or longer, detailed recordings to study your technique.
Artists love using these time-lapses for portfolio submissions, social media content, and teaching purposes. The feature is especially popular among digital artists who want to share their process with followers or clients.
Want to try it yourself? The time-lapse option can be found in the Actions menu (wrench icon) under Video. From there, you can export your recording in various formats and resolutions suitable for different platforms.
Beginner’s Guide to Procreate
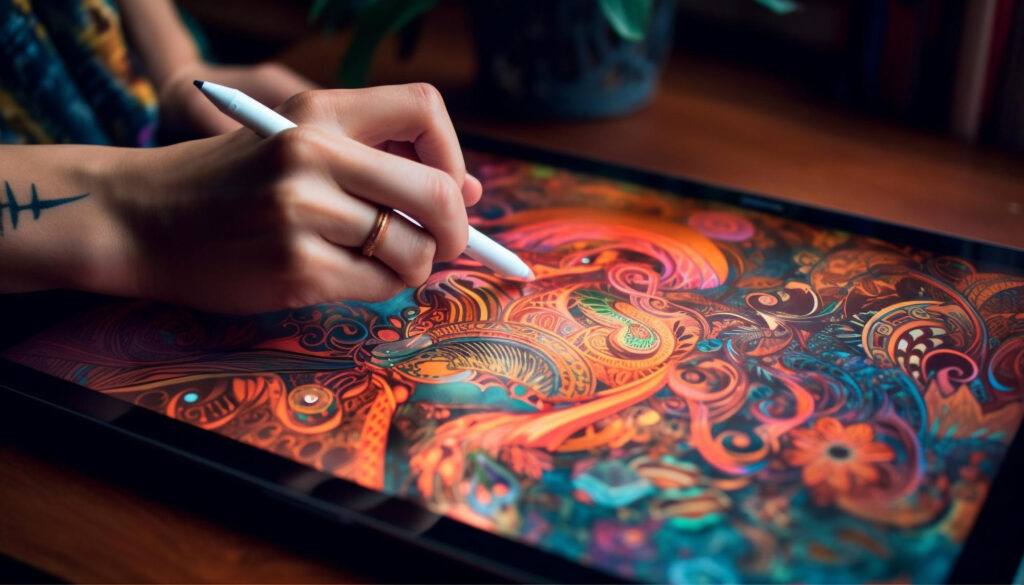
Our Beginner’s Guide to Procreate is the ultimate resource to kickstart your digital art journey. It covers everything from the basics of navigating the app to advanced techniques for creating stunning artwork so that you can not only get off to a strong start but gain confidence quickly. Dive in and unleash your creativity with Procreate!
Frequently Asked Questions
Procreate users often have common questions about maximizing their digital art experience. These FAQs cover essential aspects from professional brush recommendations to workflow optimization techniques that can transform your digital creation process.
