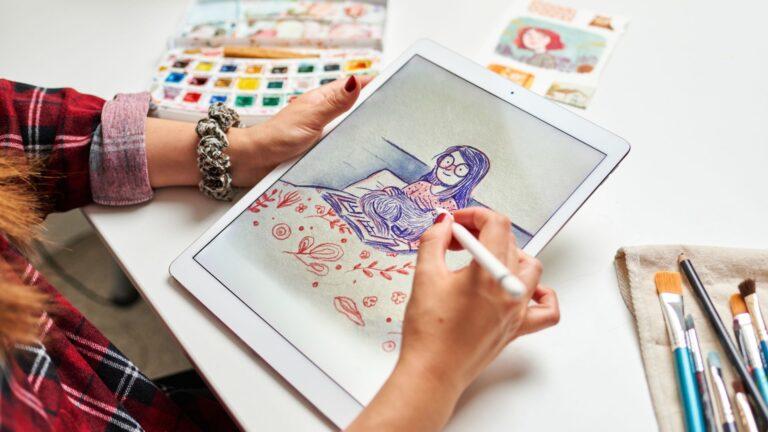
Sketching in Procreate offers an expansive canvas for creativity, merging the tactile familiarity of paper drawing with the digital advantages of an unlimited toolkit.
As a beginner, approaching this powerful app on your iPad might seem daunting, but it’s designed with intuitive features that cater to newcomers and professionals alike.
Starting your digital art journey with How to Sketch with Procreate, you’ll find yourself in control of an array of brushes and tools that simulate real-world drawing techniques.

Understanding the basics of Procreate is key to unlocking your potential in digital sketching. With tools that allow you to mimic traditional artistic methods, the app gives you the ability to experiment without the limitations of physical media.
Whether you’re aiming to create quick studies or detailed illustrations, the flexibility of Procreate meets the needs of diverse artistic styles.
Transitioning to Procreate for your artistic endeavors doesn’t require a steep learning curve. The user interface is designed to be user-friendly, ensuring that even as a beginner, you can navigate through Procreate’s features with ease.
The app emphasizes the feel of natural drawing while equipping you with powerful digital capabilities, such as layers, customizable brushes, and an extensive color palette, to enhance your sketching experience.
Getting Started: How to Sketch with Procreate
Procreate offers a wealth of tools and features designed for both beginners and seasoned artists. Understanding the interface, setting up your canvas, and selecting the right brushes are fundamental to beginning your sketching journey.
Understanding the Procreate Interface
Your first step is to familiarize yourself with Procreate’s user interface.
Upon opening Procreate, Gallery View is where you’ll find all your artwork. Tap on the + icon to start a new project, and you’ll see the canvas screen.
At the top of the canvas screen, there’s the Actions menu (wrench icon), Adjustments menu (magic wand icon), and Brush Library (brush icon).
On the left side, you’ll find the Brush Size and Opacity sliders, while the right side holds tools like Undo, Redo, and the Layers panel.
Setting Up Your Canvas
When creating a new canvas, you can select from preset sizes or create a custom one by tapping on the + icon and adjusting the width and height.
For sketching, start with a moderate size canvas such as 2048×2048 pixels to ensure a good balance between detail and performance.
Always confirm that your canvas has a good DPI (dots per inch), typically 300 DPI for high-quality prints, if you plan to print your artwork.
Selecting the Right Brushes for Sketching
Selecting the appropriate brush is crucial for your sketching technique.
In the Brush Library, you’ll find a range of brush categories. For beginners, the Sketching category contains brushes that replicate pencils and charcoal.
Experiment with different brushes like the 6B Pencil or Technical Pen to see which one feels natural for the lines and strokes you want to create.
When sketching, you can adjust the brush size and opacity using the sliders on the left side to achieve the desired effect.
Remember, Procreate also allows you to create custom brushes or download others to expand your selection.
Sketching Basics
Before diving into the world of digital sketching with Procreate, it’s essential to grasp the fundamentals of drawing shapes, organizing your artwork with layers, and effectively using the pencil tool for your preliminary sketches.
Drawing Fundamental Shapes
To begin your Procreate sketch, focus on drawing fundamental shapes. These are the building blocks of any drawing and include circles, squares, rectangles, and triangles.
Use the QuickShape tool to create perfect geometric shapes. Remember:
- Circles: Drag your pencil then hold at the end to snap into a smooth circle.
- Squares and Rectangles: Draw the shape and hold at the end; tap with another finger to lock in perfect squares or 90-degree angles.
- Triangles: Trace the three sides and hold to let Procreate clean up the lines.
Using Layers to Organize Your Sketch
Layers are crucial for separating different elements of your sketch. This organization allows you to edit parts independently without affecting the whole drawing.
- Sketch Layer: Keep your initial sketch on a separate layer for easy modifications.
- Detailed Drawing: Add details on new layers above the sketch layer for better control.
To add a layer, tap the Layers panel (two squares) in the upper right corner and select the “+” icon.
Mastering the Pencil Tool for Initial Sketches
The Pencil Tool is your primary instrument for initial sketches. It simulates a real pencil and offers versatility in brush size and opacity, which is essential for laying down the first lines of your composition.
- Brush Size: Adjust the slider to vary the thickness for broader strokes or finer details.
- Sketch Brush: Choose from various sketch brushes under the Sketching category for the desired texture and responsiveness.
Adjust opacity to keep your initial sketches light, making it easier to refine or erase if necessary.
Advanced Sketching Techniques
Mastering advanced sketching techniques in Procreate can elevate your digital artwork. This section explores how to layer textures for depth, manipulate colors for vibrancy, and apply digital inking to define forms with precision.
Incorporating Texture and Value
To impart a sense of realism to your digital sketches, you’ll want to incorporate texture and value with care.
Start by selecting a base texture that complements your subject.
Overlay additional textures, using Layer Modes and Adjust Opacity to blend them naturally.
Pay close attention to lighting direction to accurately apply highlights and shadows—crucial for conveying value.
- Layering Textures:
- Base Texture: 100% opacity
- Secondary Textures: 50-70% opacity
- Tertiary Details: 30-50% opacity
Remember, textures should enrich your artwork, not overpower it.
Effective Use of Colors and Swatches
Colors can drastically impact the feel of your sketch. Begin by choosing a harmonious color palette.
Procreate’s swatches allow you to save preferred color combinations and ensure consistency across your artwork.
Utilize the Color Picker to select and adjust hues to match the mood of your piece.
Color Tips:
- Keep a limited palette to avoid overwhelming the viewer.
- Use contrasts (light/dark, warm/cool) to make elements pop.
- Negative space: Utilize it to let your colors breathe.
Exploring Digital Inking and Shading
Digital inking provides the foundation for your artwork’s final look. With Procreate’s various brush settings, you can mimic traditional inking techniques tailored to your personal style.
Use Streamline for smoother strokes, or a Textured Brush for a more traditional feel.
Shading, on the other hand, requires an understanding of light sources to apply tones properly—use a soft brush to create a range of shadows for depth.
Inking & Shading Guide:
- Line Weight: Vary your pen pressure for dynamic inks.
- Shading Method: Soft shading for gradual transitions; cross-hatching for a textured effect.
Refining Your Sketch
To elevate your artwork in Procreate, mastering the processes of erasing, smudging, masking, adjustments, and effects is crucial. These tools enable you to hone the initial outlines and move towards a more polished illustration.
The Role of Erasing and Smudging
Erasing: Use the eraser tool to clean up unwanted lines. Procreate provides various eraser brushes to selectively remove certain aspects of your sketch, allowing for precision and control.
Remember that the eraser’s size and opacity can be adjusted just like a brush.
Smudging: The smudging tool can blend and soften edges.
With smudge, you’ll mix colors or values in your sketch, creating gradients or textures. Select from Procreate’s smudge brushes to achieve the level of smoothness or texture you seek.
Utilizing Masks and Adjustment Layers
Layer Masks: Adding a layer mask permits non-destructive alterations.
You can hide portions of your layer by painting black on the mask, while white reveals areas. This is excellent for experimenting with different looks without compromising your original sketch.
Adjustment Layers: Procreate offers various adjustment features to tweak your sketch’s visual properties.
Examples include altering brightness, contrast, saturation, and even applying color balance. This can radically change the mood and depth of your artwork.
Transforming Your Sketch with Effects
Transform Tool: By choosing the transform tool, you can scale, rotate, and warp your sketch.
This helps to refine the composition of your drawing, allowing for quick adjustments to the layout or perspective.
Effects: Use Procreate’s effects to add flair or correct imperfections.
The effects menu provides a plethora of options—like blurring, sharpening, and noise—that can be applied to single layers or the entire canvas, giving you ample creative freedom.
Animation and Effects
Introduction to Animation in Procreate
Procreate’s Animation Assist offers you an effortless yet powerful approach to creating frame-by-frame animations.
Start by tapping the Actions Menu (wrench icon) and then select Canvas > Animation Assist.
This feature will display a timeline at the bottom of the canvas, allowing you to add and manage frames effectively.
- Steps to Create Basic Animation:
- Turn on Animation Assist in the Actions Menu.
- Each layer represents a frame; add new layers for subsequent frames.
- Preview your animation with the play button.
Remember, varying the opacity of each layer can help you create smoother transitions between frames for a more natural motion effect.
Creating Dynamic Effects with Brushes
Procreate’s brush library is robust, offering a plethora of brushes that can contribute to both the aesthetic of your animation and the creation of dynamic effects.
You can use brushes to apply textures, patterns, and even to add particle effects.
- To Add Effects with Brushes:
- Select a brush that complements the type of effect you’re looking to create.
- Modify brush settings to adjust stroke thickness, opacity, and other dynamics.
- Experiment with layer blending modes to intensify or subtly integrate effects.
By utilizing these features, you can imbue your animations with depth and personality, whether you’re aiming for a light sparkle or a dramatic fiery trail.
Workflow Optimization
Enhancing your Procreate experience demands a strategic approach to your workflow.
By implementing shortcuts and effectively organizing your brush library, and leveraging layers, you can refine your process and spend more time creating and less time managing tools and menus.
Using Shortcuts and Gestures for Efficiency
Procreate offers a variety of shortcuts and gestures that allow you to streamline your sketching workflow.
For instance:
- Straight Line / Shape Creation: Draw your intended line or shape, then hold your stylus or finger on the canvas to snap it to a perfect geometric form.
- Scale and Rotate: Continue holding, then drag to adjust the size or rotation. Placing a second finger on the canvas while dragging rotates shapes in precise 15-degree increments.
- QuickMenu Access: Instead of tapping, drag your finger toward a button to quickly perform an action, even eliminating the need for the menu to appear.
Remember, incorporating these gestures can drastically reduce the time spent navigating menus, allowing you to keep your focus on the canvas.
Organizing Brushes in the Brush Library
Your Brush Library is a pillar of your digital art setup. To optimize this tool:
- Custom Brushes: Customize and save your frequently used brushes to easily access them for future projects.
- Brush Sets: Group similar brushes into sets, resulting in a tidier library and quicker selection during your creative process.
Organizing your brushes can promote a more intuitive selection, avoiding disruption while you track your creative progress.
For more on this topic, check out our post: Organize Your Brushes in Procreate.
Leveraging Layers for Complex Compositions
The use of layers is crucial for managing complex compositions. Here are some ways to utilize them effectively:
- Non-Destructive Editing: Edit individual elements without affecting the rest of your drawing.
- Advanced Techniques: Experiment with blending modes and layer effects to enrich textures and details.
Mastering layers can elevate the quality of your artwork and bolster your ability to handle intricate designs with control and ease.
Finalizing and Sharing Your Art
Before sharing your masterpiece, it’s essential to ensure your artwork is finely tuned and formatted correctly for its intended destination, whether that’s social media, a personal portfolio, or an online marketplace like Envato Elements.
Preparing Your Artwork for Export
When finalizing your piece in Procreate on your iPad, navigate to the Actions menu to find export options. Here’s how to prepare your artwork:
- Adjust Layers and Opacity:
- Review each layer to make sure all elements are correctly aligned.
- Modify the opacity to your liking to ensure that every element in your artwork presents as intended.
- Exporting Options:
- File Format: Choose a format that suits your needs. Export as .procreate to retain layers, or choose JPEG, PNG, or PDF for a flat image.
- Quality and Size: Adjust dimensions and resolution to fit the requirements of the platform where you’ll upload the image.
Sharing to Social Media and Online Platforms
Sharing your art on social media and platforms like Envato Elements requires attention to detail:
- Social Media:
- Ensure your image size and aspect ratio fit the platform’s standards (e.g., Instagram’s square, portrait, or landscape formats).
- Export your artwork directly to platforms like Instagram or Facebook using the ‘Share’ option in Procreate.
- Envato Elements:
- For Envato Elements, ensure your image meets their submission guidelines for resolution and file type.
- Keep a copy of your original Procreate file in case you want to make alterations before uploading to the marketplace.
Resources and Further Learning
To master sketching in Procreate, it’s crucial to leverage the wealth of resources available. Accessing tutorials tailored to your skill level and exploring additional tools can significantly enhance your digital art journey.
Accessing Procreate Tutorials
Start with Procreate’s Beginners Series to understand the essentials such as color, brushes, layers, and effects.
The lessons typically range from 45 to 60 minutes and allow you to build upon your digital art skills methodically.
For instance, you can learn to create a night scene while exploring more advanced features like blend modes and custom brushes.
- Best Procreate Tutorials for Beginners and Advanced:
- Beginners: Focus on basic tools and the step-by-step drawing process including sketching, coloring, shading, and finishing.
- Advanced: Dive into more complex features and techniques to add depth to your digital paintings.
YouTube also provides an array of tutorials, where visual learners can find guides on everything Procreate offers.
For example, How to Draw in Procreate | Beginners Guide breaks down the drawing experience into attainable steps.
Exploring Additional Digital Art Tools and Apps
Expanding your toolkit can make the difference in your digital painting projects.
Along with Procreate, consider familiarizing yourself with other digital art apps that offer unique tools and features. Here’s a quick comparison to get you started:
| App Name | Key Feature | Suitable For |
|---|---|---|
| Adobe Fresco | Live Brushes for realistic effects | Intermediate artists |
| Autodesk SketchBook | Professional-grade tools | Professional artists |
| ArtRage | Natural painting & drawing tools | Hobbyists |
Unlimited access to tutorials and exploring various art applications allows you to keep learning and adapting your artistic style. Embrace the process, experiment with different tools, and remember that every piece of art contributes to your growth as a digital artist.
Creative Exploration in Procreate
Procreate offers a robust platform for artists to explore creative avenues, especially when it comes to drawing portraits and landscapes, or experimenting with features like symmetry and perspective, which are key components of compelling artwork.
Drawing Portraits and Landscapes
When you start your journey of drawing portraits in Procreate, the primary focus should be on capturing the essence of the subject.
You can employ a range of brushes and tools to mimic the intricacies of human features. For landscapes, the app’s vast brush library enables you to depict textures and natural elements effectively.
- Portraits:
- Use a soft brush for skin tones and blending.
- A hard brush can define edges and sharp features.
- Landscape:
- Textured brushes give a natural feel to elements like trees and rocks.
- The smudge tool can create the illusion of water and sky blending at the horizon.
Experimenting with Symmetry and Perspective
Symmetry in Procreate is not just for patterns but also for structuring faces and objects accurately.
Use the Symmetry tool to ensure balance and proportion in your designs.
For creating depth and dimension, the Perspective Guide is indispensable.
By mastering perspective drawing, your landscape can have the convincing 3D look you desire.
- Symmetry:
- Find it under Actions > Canvas > Drawing Guide > Edit Drawing Guide > Symmetry.
- Options include vertical, horizontal, quadrant, and radial symmetry.
- Perspective:
- Set up your vanishing points using the Perspective Guide.
- Apply the guide to ensure elements in your landscape follow the same perspective, strengthening the 3D effect.
Hardware and Accessories
Selecting the appropriate hardware and accessories significantly enhances your Procreate experience, providing precision and efficiency in your sketching endeavors. This section will guide you through optimizing your sketching process with the right tools.
Optimizing with the Apple Pencil
When sketching in Procreate, the Apple Pencil is the preferred stylus for its pressure sensitivity and palm rejection capabilities.
Pairing the pencil with your iPad is straightforward:
- Attach the Apple Pencil to the magnetic connector on the side of your iPad (for the 2nd generation) or plug it into the Lightning connector (1st generation).
- Follow the on-screen pairing instructions.
Once connected, you’ll gain access to features such as drawing guides, layer masks, clipping masks, and alpha lock with precision.
Choosing the Right iPad for Procreate
Procreate is designed to work seamlessly with the iPad, but certain models offer a better sketching experience with more advanced features. Below is a comparison to help you choose:
| iPad Model | Display Size | Supported Apple Pencil | Key Points |
|---|---|---|---|
| iPad Pro | 11″ & 12.9″ | 2nd generation | Largest work area, best performance, ProMotion technology |
| iPad Air | 10.9″ | 2nd generation | Portable, powerful, good for beginners and pros |
| iPad Mini | 8.3″ | 2nd generation | Ultimate portability, suitable for on-the-go use |
| iPad (8th gen.+) | 10.2″ | 1st generation | Budget-friendly, supports basic Procreate features |
Consider factors such as screen size and Apple Pencil compatibility when selecting the iPad that suits your sketching needs the most.
Frequently Asked Questions
In this section, we answer common questions to streamline your learning process and help you master the fundamentals of sketching in Procreate.
