Creating the perfect blending brush in Procreate can elevate your digital art by smoothening transitions and adding a professional touch. In this article on How to Make a Blending Brush in Procreate, we’ll show you how to get started by duplicating an existing brush and adjust its properties for optimal smudging. This method ensures you can keep the original brush settings intact while experimenting with new configurations.
Next, delve into the Brush Studio and explore the Rendering and Wet Mix menus to fine-tune the blending effects. Changing the Rendering Mode to Intense Blending and adjusting the Wet Mix settings can significantly enhance your brush’s performance in achieving seamless blends.
Organizing your custom brushes into categories like “Soft Blending” or “Textured Blending” can streamline your workflow. By grouping similar brushes, you can quickly find the right tool for any specific task, making your creative process more efficient and enjoyable.
Understanding Blending Brushes in Procreate
Blending brushes in Procreate are essential tools that help you achieve smooth transitions and realistic effects in your digital artwork. Procreate offers a variety of blending options to enhance your creative process.
Key Features of Blending Brushes
- Customization: You can customize blending brushes by adjusting settings such as opacity, flow, and texture. This allows for precise control over your blending techniques.
- Categories: Group your blending brushes into custom categories like “Soft Blending” and “Textured Blending” to easily locate them when needed.
Using Blending Modes
Blending brushes work with different blend modes, which determine how colors on one layer interact with colors on another. Experimenting with modes like “Multiply” can darken colors, while “Screen” brightens them. Understanding these modes will help you create the desired effect.
Smudge Tool
The Smudge tool is another way to blend in Procreate. Select the Smudge tool from the toolbar and choose a brush from the Brush Library. Adjust the size and opacity to create smooth gradients and transitions in your artwork.
Steps to Create a Blending Brush
- Duplicate a Brush: Select the brush you want to use and duplicate it. This allows you to keep the original brush while customizing the new one.
- Adjust Settings: Go to the Properties setting and tweak the smudge settings to achieve your desired blending effect.
Procreate’s versatility in blending techniques provides artists with numerous options to bring their digital creations to life. For more detailed guidance on organizing and customizing your brushes, check out our post on How to Organize Your Brushes in Procreate.
Creating Your Custom Blending Brush
To create your custom blending brush in Procreate, you will need to access the brush library, start with a new brush, customize its properties, and adjust brush dynamics to meet your specific artistic needs.
Accessing the Brush Library
Begin by opening Procreate on your iPad. Tap the brush icon at the top right corner of the screen to access the Brush Library. This library contains various pre-made brushes organized into categories.
Scroll through the categories to find the brush set that best suits your style. You can also use the search bar to quickly locate specific brushes. Once you’ve found a brush you like, select it to use as the base for your custom blending brush.
Starting with a New Brush
To create a new brush, duplicate an existing one. In the Brush Library, swipe left on the selected brush and tap “Duplicate.” This will create an exact copy of the brush, preserving the original settings. This duplicated brush will serve as the foundation for customization.
Alternatively, tap the “+” symbol in the top-right corner of the Brush Library to create a new brush from scratch. This opens the Brush Studio, where you can modify various brush settings.
Customizing Brush Properties
In the Brush Studio, navigate to the “Properties” section. Here, you can adjust fundamental brush characteristics such as size limits, opacity, and setting sliders.
Modify the “Smudge” settings to enhance the blending effect. Set the “Smudge Strength” to a higher value for smoother transitions between colors. This will help you achieve softer edges and more seamless blends in your artwork.
Adjusting Brush Dynamics
For advanced customization, go to the “Dynamics” section. Adjust parameters such as “Pressure” and “Tilt” to personalize how the brush responds to different strokes.
Under “Rendering,” change the mode to “Intense Blending” for more potent blending effects. Adjust the “Wet Mix” settings to control how the brush interacts with existing colors on the canvas. Set the “Charge” to around 50% for a balanced effect.
By tweaking these settings, you can create a custom blending brush tailored to your unique artistic style. Practice using the brush in various scenarios to refine its performance and ensure it meets your expectations.
Fine-Tuning Blending Options
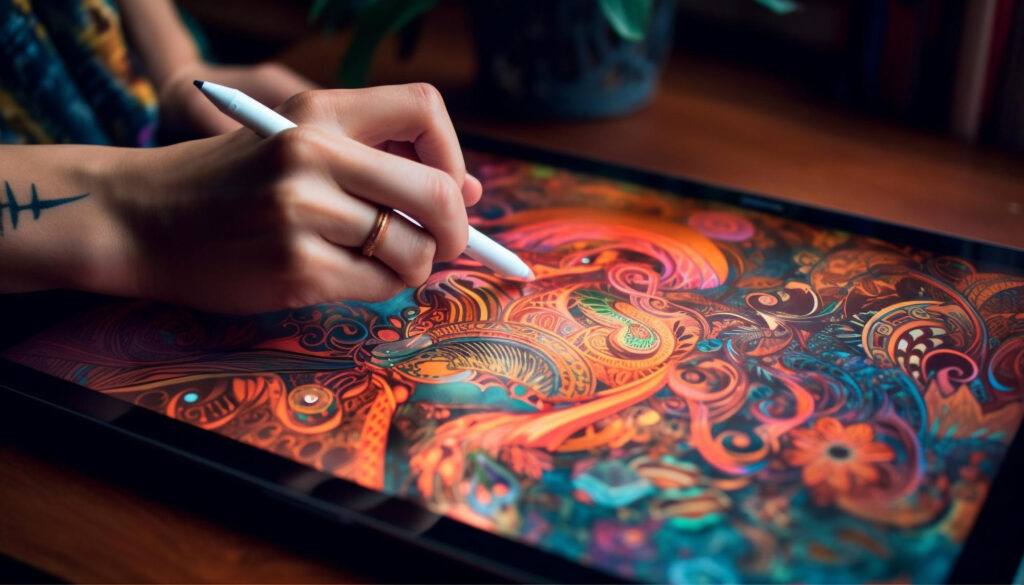
When creating a blending brush in Procreate, fine-tuning various settings can significantly improve the blending experience. Key areas to focus on include adjusting brush behavior, modifying grain and texture, and tweaking opacity and flow.
Setting Brush Behavior
Start by selecting the appropriate brush behavior settings. Procreate allows you to customize how your brush interacts with the canvas. Navigate to the Brush Studio and explore options under Stroke Path.
Adjust Spacing to control the interval between each stamp of your brush. Smaller spacing will result in smoother lines. Tweak Jitter to add randomness to stroke placement for a more natural effect. Experiment with the Shape and Angle controls to modify the orientation and shape dynamics of your brush.
Modifying the Grain and Texture
Refine the blending brush by adjusting the grain and texture settings. In the Brush Studio, head to the Grain section. Here, you can import custom grain images or use pre-loaded textures.
Adjust the Scale setting to change the size of the grain pattern. Smaller scales give more detailed textures, while larger scales create bolder effects. Rotation lets you control the angle of the grain, adding variety to your strokes.
For seamless blending, tweak the Movement setting to switch between fixed and rolling grain. This affects how the texture follows your brush movement.
Adjusting Opacity and Flow
Fine-tuning opacity and flow is crucial for achieving the perfect blend. Open the Brush Studio and navigate to the Dynamics section.
Adjust the Opacity slider to control how transparent your brush strokes are. Lower opacity levels result in subtler blending. Utilize the Flow control to determine the rate at which paint is applied. Lowering the flow will produce softer transitions.
Explore the Pressure and Tilt settings to link brush opacity and flow to stylus pressure and angle, providing more granular control during blending.
Testing and Adjusting Your Brush
Creating a blending brush in Procreate involves continuous testing and adjustment to ensure optimal performance. You’ll want to preview how your brush behaves, refine its settings, and save your custom brush for future use.
Preview Your Brush
Once you’ve created your initial blending brush settings, it’s important to thoroughly test it. Open a new canvas in Procreate, select your brush, and make several strokes. Pay attention to how the brush interacts with colors and textures. Notice if it blends smoothly or if there are any inconsistencies.
You may find it helpful to use a variety of colors and textures in your strokes. This will give you a more comprehensive understanding of how your brush performs in different scenarios. Testing on layers with different opacities can also reveal how your brush handles nuances in blending. If necessary, keep a test pad dedicated to this process.
Refine Brush Settings
After testing, you may need to refine your brush settings. Go back into the Brush Studio and explore the different menus. In the Rendering menu, adjusting the Rendering Mode to Intense Blending can enhance the smoothness of your blends. The Wet Mix settings, like Charge and Pull, are crucial for the texture and intensity of blending.
Experiment with Grain and Shape within the Brush Studio. Adjusting scatter, rotation, and width can drastically change how the brush lays down texture. The key is to make small adjustments and test frequently to see how each change impacts performance.
Save Your Custom Brush
Once you are satisfied with the adjustments, save your brush in Procreate. Tap on the + symbol in the brush library to save your custom brush settings. Name the brush something descriptive so you can easily identify it later.
Creating custom categories can also help in organizing your brushes. For instance, create folders like Soft Blending, Textured Blending, or Edge Control. This organization will streamline your workflow, making it simple to locate the right brush when needed.
Regularly back up your custom brushes to avoid losing them. Export the brushes and save them in a cloud service or external storage. This ensures that all your hard work remains safe and accessible.
How to Make a Blending Brush in Procreate and Apply It to Your Work
Successfully applying your Procreate blending brush requires mastering practical techniques and combining it effectively with other brushes for a polished finish.
Practical Blending Techniques
Using your blending brush efficiently can elevate your digital artwork. Start by selecting the appropriate brush for the area you wish to blend. Adjust the size and opacity of the brush to suit the texture and seamlessness you are aiming for. A smaller brush with lower opacity is ideal for subtle transitions between colors. For larger areas, increase the brush size to cover more ground without losing control of detail.
Employ circular, soft strokes to gently merge different colors. This technique is particularly effective for blending skin tones or creating smooth, gradient backgrounds. Moving in small, repetitive motions can help achieve a natural, polished look.
Experimenting with different pressure levels on the screen can bring a varied blending effect. Light pressure blends softly, while added pressure can create more pronounced transitions.
Combining with Other Brushes
Combining the blending brush with other brushes allows you to create complex textures and effects. For instance, start with a textured brush to lay down base colors and shapes. Once the base is established, switch to your blending brush to smooth out harsh edges and refine transitions.
Using the Smudge tool alongside your blending brush can also create unique effects. Select a brush from the Brush Library specifically for smudging and adjust its settings to complement your primary blending brush.
Additionally, applying a Gaussian Blur effect in combination with manual blending offers a controlled softening of edges, enhancing the depth and realism of your artwork. This technique is effective for backgrounds or any area requiring gradual transitions.
Maintaining and Sharing Your Brush
To get the most out of your Procreate brushes, it’s important to back them up and know how to share them with others. These practices ensure you preserve your custom brushes and can collaborate effectively with fellow artists.
Backing Up Your Brushes
Backing up your brushes is a crucial step to prevent loss of your custom creations. First, export your brush sets by opening Procreate, selecting your brush library, and choosing the brushes or sets you wish to save. Tap on the brush or set, then select “Share.” Choose your preferred backup location like iCloud, Dropbox, or Google Drive.
Regularly updating these backups is essential. Schedule periodic backups to ensure your latest changes and new brushes are always saved. Consider creating a dedicated folder for Procreate backups, making it easier to locate specific brush sets later.
When exporting, use a clear naming convention to avoid confusion. For instance, label brushes by their function, such as “Soft Blending 2023” or “Textured Edges June 2024.” This way, even weeks or months later, you’ll find the correct brushes quickly and efficiently.
Sharing Brushes with Others
Sharing brushes can greatly enhance your collaborative projects. To start, select the brush or set you’d like to share from your brush library. Tap “Share” and choose how to send the file, such as via email or messaging apps.
Ensure the recipient has Procreate installed. Sending a direct download link through cloud services like Dropbox or Google Drive can simplify the process. Provide clear instructions if needed, explaining how to import the brush into their Procreate app.
When sharing brushes, consider license or usage limitations. If you want to keep certain rights, clearly communicate terms of use. You might state whether the brush is free for personal use only or if it can be used commercially.
Creating a network of shared brushes with fellow artists can inspire new techniques and artistic growth. Sharing your unique brushes may even lead to collaborative projects and strengthen professional relationships.
Frequently Asked Questions
Creating a blending brush in Procreate involves selecting and duplicating existing brushes, followed by adjusting brush settings. Using the smudge tool and finding quality blending brushes can enhance your digital artwork. Here are the specifics to help you get started.


