Learning how to draw a dragon in Procreate can be both a rewarding and enjoyable process for any digital artist. This powerful app offers a range of tools that simplify creating intricate dragon illustrations. The key is to utilize Procreate’s features, such as mesh guides and custom brushes, to craft detailed scales and textures.
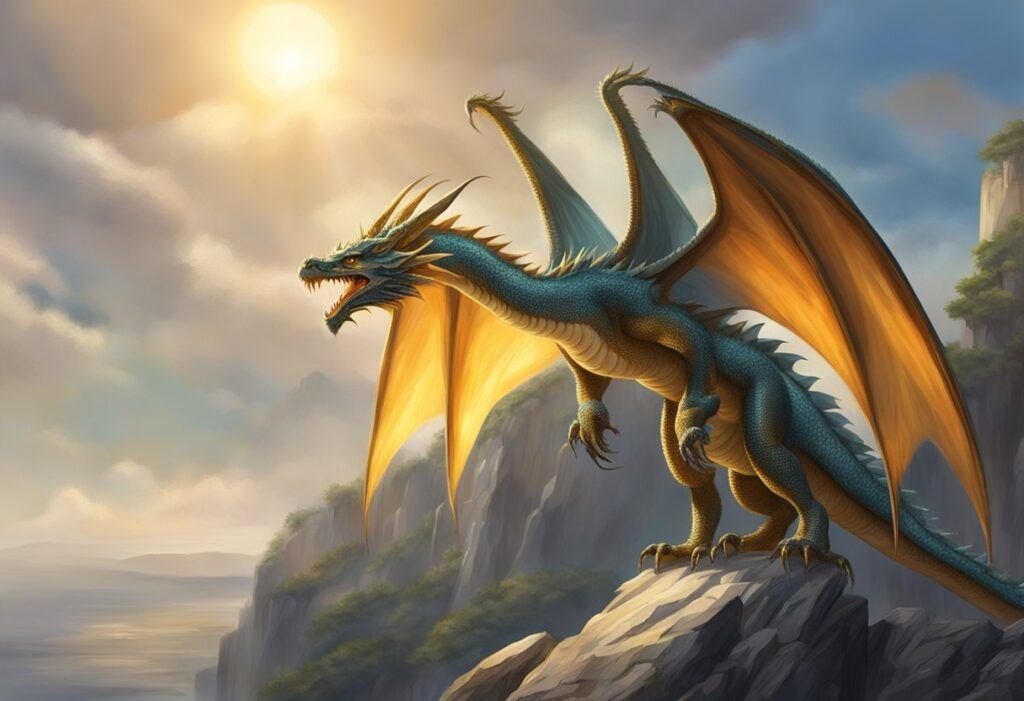
Whether you’re inspired by traditional Chinese dragons or mythical creatures from movies, Procreate provides the flexibility to bring your imagination to life. You can start by sketching a basic outline and then refine it using Procreate’s technical brushes. Experiment with watercolor brushes to add vibrant colors and depth to your dragon illustration.
Creating lifelike movement and dynamic poses requires careful planning. By designing a mesh guide, you can determine the curvature of the dragon’s body, achieving a more natural look for the scales and overall form. With Procreate, your artwork will stand out, offering a professional finish that you’ll learn to apply through our to your dragon illustrations.
Step 1: Setting Up Procreate
Before diving into drawing your dragon, it’s essential to set up Procreate properly. Ensuring you have the right canvas size, understanding the interface, and selecting the best brushes will make your dragon illustration process smoother.
Choosing the Right Canvas and DPI
Selecting the correct canvas size and DPI (dots per inch) is crucial in creating detailed artwork.
Canvas Size: For dragon illustrations, a canvas size of 3000 x 3000 pixels provides enough space to detail scales and other intricate parts.
DPI: A DPI of 300 is recommended for maintaining quality, especially if you plan to print your artwork. Higher DPIs like 600 can be chosen for even finer details but be mindful of file size.
Understanding Procreate’s Interface
Navigating Procreate’s interface efficiently helps you work faster.
Top Menu: Contains options like ‘Gallery’, ‘Actions’, and ‘Adjustments’. Use ‘Actions’ for canvas settings, importing files, and saving your work.
Brush Library: Located on the right side, it offers a range of brushes suitable for your project.
Layers Panel: Found on the top right, it helps manage different elements of your dragon drawing with ease.
Selecting Brushes for Dragon Artwork
Choosing the right brushes sets the foundation for your dragon’s textures and details.
Technical Brush: Ideal for sketching and creating the initial outline of your dragon.
Inking Brushes: These help in refining outlines and adding sharper details.
Texture Brushes: Use brushes like ‘Grainy’ and ‘Coarse’ to add realistic textures to scales and wings. Procreate’s vast library also includes custom brushes that simulate fur, scales, or smoke, enhancing your dragon’s look. With the right brushes, you’ll bring your dragon to life with vivid detail and texture.
Step 2: Starting Your Sketch
Begin your dragon drawing by creating a foundation that outlines the basic structure and form. Using the layering capabilities of Procreate can help you build your design methodically.
Creating Basic Shapes
Start by sketching simple shapes to form the basic structure of your dragon. Use circles for the head and joints, and connect them with straight lines for the spine and limbs.
Begin with low opacity to keep these initial shapes light and easy to modify. Work on a separate layer to ensure you can easily make adjustments without affecting the rest of your drawing.
Focus on maintaining proportion and symmetry in your initial sketches.
Defining the Dragon’s Anatomy
Once your basic shapes are in place, you need to define the anatomy of your dragon. Sketch out the body structure along the spine, keeping an eye on how muscles and bones would realistically curve and form.
Think about how a dragon’s scales might follow the lines and contours of the body. Refer to anatomical references if needed to get an accurate and dynamic pose. Work on separate layers for different body parts like wings, tail, and limbs to allow for easy adjustments.
Refining Edges and Curves
With the dragon’s anatomy sketched out, refine the edges and curves to add more detail and realism. Increase your brush size and opacity when outlining the final form.
Focus on edges like the wings, tail, and claws, adding detail to individual scales and skin texture. Smooth out any rough lines and work on the dragon’s expression to give it character. Pay attention to the transitions between different parts, ensuring that curves flow naturally.
Refine your sketch on a separate layer to keep your original structure intact.
Step 3: Enhancing the Preliminary Sketch
Enhancing the initial sketch of your dragon involves adding intricate details to the head, designing the dragon scales and texture, and refining the wings and tail.
Adding Detail to the Head
Focus on defining the dragon’s facial structure first. Sketch sharp horns and piercing eyes to give personality. Use fine lines for the nostrils and mouth to add depth.
Incorporate wrinkles and muscle definition around the eyes and mouth, showing the dragon’s toughness. Don’t forget the ears or any spines along the jawline. Small details in this area will bring your dragon to life and set the tone for the rest of the sketch.
Designing Dragon Scales and Texture
Start by planning the pattern of your dragon scales using a mesh guide. This will ensure the scales curve naturally with the dragon’s body. Use Procreate’s built-in brushes like the Effortless Brush for an efficient start.
Focus on areas with motion such as the neck, legs, and tail. Vary the scale size to create a realistic texture. For more drama, add shadows and highlights. This contrast will make the scales appear three-dimensional and enhance the texture of your drawing.
Sketching the Wings and Tail
For the wings, begin with the basic shape, similar to a bat’s wing, with a strong primary bone structure. Sketch the membrane extending between the bones, paying attention to the tension and folds.
The tail should reflect the dragon’s overall movement. Add spikes or spines along the tail’s length to make it more dynamic. Ensure your sketch reflects how the tail’s form aligns with the dragon’s posture and balance.
By focusing on these areas, you give depth and detail to your dragon, creating a more polished and lifelike illustration.
Step 4: Coloring Techniques in Procreate
When coloring your dragon in Procreate, you will need to master several techniques to achieve a dynamic and visually appealing result. This involves applying base colors, working with color palettes and swatches, and utilizing layers for colors and shading.
Applying Base Colors
Start by choosing your primary base color for the dragon. Use the Color Picker tool to select the intended color and fill in the main areas of your dragon. You can drag and drop the color into the selected areas to ensure a smooth application. It is crucial to use a clear base layer, as it sets the foundation for all subsequent detailing and shading.
To maintain crisp edges, ensure that you have set up clean line art. Procreate’s selection tool can help you isolate specific areas if you’d like to work without impacting other parts of your drawing. Consider using a separate layer for each large region, like the body, tail, and wings, for more control.
Working With Color Palette and Swatches
Creating a custom color palette can streamline your workflow and keep your colors consistent. Save a range of colors that you plan to use for different parts of your dragon—such as scales, wings, and eyes—by using Procreate’s swatch palettes.
To create a swatch palette, tap on the Palette icon and select “Create New Palette.” You can add colors to this palette directly from the Color Picker. This way, you can easily switch between colors without spending time to reselect or reconfigure them. Organize your palette by usage, making it easier to find the exact shade you need quickly.
Utilizing Layers for Colors and Shading
Using layers effectively can significantly enhance your coloring process. Start with your base color layer and then add new layers on top for different elements of the coloring process, such as shadows, highlights, and textures.
Label each layer accordingly (e.g., “Base Color,” “Shading,” “Highlights”) to keep your workspace organized. Utilize layer blend modes like Multiply for shadows and Overlay for highlights to create depth and realism. You can also adjust the opacity of each layer to achieve subtle gradations in color and shading.
By separating each stage of your coloring on different layers, you gain more control and the ability to make adjustments without altering the entire image. This technique also allows for non-destructive editing, meaning you can change or remove an effect without affecting the underlying colors.
Step 5: Adding Depth and Dimension
To bring your dragon drawing to life in Procreate, it’s crucial to add depth and dimension. Focus on techniques such as shading, texture creation with different brushes, and utilizing layer modes.
Shading Techniques
Shading adds volume and form to your dragon, making it appear more three-dimensional. Use Procreate’s Multiply layer mode to build up shadows. Start by identifying the light source and apply darker shades opposite to it.
Use soft brushes to create smooth transitions between light and shadow areas. Use multiple layers for more control, adjusting opacity to achieve softer or harsher effects. Experiment with the Gaussian Blur feature to blend shadows seamlessly.
Creating Texture with Brushes
Brushes in Procreate can simulate various textures that mimic real-life dragon scales. Custom brushes can be downloaded or created to add specific textures. Experiment with textured brushes to paint scales, skin, or any intricate details.
Start with a base texture using a medium-opacity brush. Add finer details with smaller brushes or stamps. Adjust brush settings like spacing and jitter to vary textures and avoid repetition.
Using Layer Modes for Realistic Effects
Layer modes modify how layers interact, crucial for achieving realism. The Multiply mode is perfect for darkening areas and adding shadows. The Overlay mode can enhance colors and increase contrast.
Utilize Soft Light for subtle lighting effects, and Screen to lighten parts without losing detail. Tweak Opacity for subtle blending. Combine different modes on various layers to achieve a balanced and realistic appearance.
Exploring these layer modes will give your dragon depth, making it leap off the screen. Effective use of lighting, shadows, and textures will ensure your dragon looks lifelike in every detail.
Step 6: Finalizing the Dragon Illustration
To complete your dragon illustration in Procreate, focus on refining details, adding final touches, and preparing your artwork for sharing. This process will make your dragon look polished and professional.
Detailing with Line Brushes and Inking
Use Procreate’s line brushes to add intricate details to your dragon. Select a fine-tipped brush to outline the dragon’s scales, claws, and facial features.
Ensure every line is precise to create a clean and defined look. For inking, choose a smooth ink brush to go over the sketch lines. Inking solidifies the design and enhances the contrast. It’s crucial for creating a professional appearance and making the illustration stand out.
Applying Finishing Touches
Once your inking is complete, it’s time to apply the finishing touches. Use shading and highlighting techniques to add depth and dimension to your dragon. Adjust the opacity and blend modes of your brushes to achieve realistic shadows and highlights.
Consider adding texture to your dragon’s scales using custom brushes or the built-in Procreate textures. Add any background elements or additional details like fire or smoke to enhance the composition.
Exporting Your Artwork
After finalizing your dragon illustration, it’s important to export it correctly. Go to the actions menu (wrench icon) and select Share. Choose the file format that best suits your needs, such as PNG for high-quality images or JPEG for web usage.
For sharing on Instagram, ensure your canvas size is optimized for social media dimensions to maintain image quality. Save a high-resolution copy to your device and upload it to your preferred platforms.
Advanced Techniques
Advanced techniques can add a high level of detail and sophistication to your dragon illustration. This section explores how to utilize clipping masks and alpha lock, incorporate watercolor textures, and efficiently use repeating elements with brushes.
Using Clipping Masks and Alpha Lock
Clipping masks and alpha lock are powerful tools in Procreate. Clipping masks allow you to apply effects to specific parts of your dragon without affecting other areas.
To create a clipping mask, select the layer you want to clip and choose “Clipping Mask” from the layer options. This confines your strokes to the layer below, helping you add details like highlights and shadows precisely where needed.
Alpha lock, on the other hand, locks the transparency of a layer, ensuring that your new strokes only affect existing pixels. Enable alpha lock by swiping right on the layer or selecting “Alpha Lock” from the layer options menu. This technique is particularly useful for refining scales and adding texture to your dragon’s body.
Incorporating Watercolor Textures
Watercolor textures can give your dragon a unique, organic feel. Procreate offers several brushes designed to mimic watercolor effects.
To begin, choose a watercolor brush from the brush library. You can find these in sets like “Watercolor” or create your own from custom settings. Start by laying down a base color with a large brush, then layer lighter and darker hues to create depth.
For more realistic blending, adjust the brush opacity and experiment with the blending modes. “Multiply” and “Overlay” are particularly effective for watercolor textures. You can also use watercolor stamp brushes to add subtle variations and imperfections, enhancing the hand-painted look.
Repeating Elements with Brushes
Procreate’s brush engine makes it easy to replicate repeating elements like scales or patterns on your dragon. Using custom brushes, you can create uniform, intricate designs without manually drawing each detail.
To create a repeating brush, go to the brush library and select “New Brush.” In the brush studio, adjust settings like spacing and scatter to control how the brush repeats your design.
Premium brushes, available from Procreate or third-party sources, often come with predefined repeat patterns, saving you time and effort. When using these brushes, vary the pressure and angle to add natural variation to your illustration.
Using these advanced techniques, you can elevate your dragon illustrations, making them more detailed and realistic. Incorporate clipping masks and alpha lock for controlled detailing, use watercolor textures for a unique effect, and leverage repeating brushes to streamline your workflow.
Additional Resources
To enhance your dragon illustrations in Procreate, it is beneficial to explore premium brushes, detailed tutorials, and active online communities. These resources offer specialized tools and firsthand guidance to refine your skills.
Downloading Premium Brushes and Textures
Premium brushes and textures can significantly elevate the quality of your dragon illustrations. Various platforms offer Procreate brush sets specifically designed for different types of scales, wings, and textures. Be sure to check out our Comprehensive Guide to Procreate Brushes to learn more.
Make sure to check for brush packs that include versatile options like paintbrushes, pencil textures, and special effect brushes. Many artists also release tailored brushes through their Instagram profiles, allowing direct purchase or sometimes even free downloads.
Accessing Tutorial Files and Guides
Access to tutorial files and guides is crucial for learning advanced techniques. Many artists provide PDF guides and sketch templates that align with their tutorials. For instance, you might find detailed instruction PDFs on websites like Skillshare, Udemy, and ArtStation Learning.
Some tutorials include files such as base sketches, color palettes, and step-by-step guides which can be downloaded and used in your work. YouTube channels often link to helpful resources in their video descriptions, where you can upload guides and templates to follow along.
Leveraging Online Communities for Feedback
Engaging with online communities can provide valuable feedback on your work. Platforms like Reddit (r/Procreate), ArtStation, and specific Facebook groups for Procreate users are rich sources of critique and support.
Many artists actively participate in these communities, offering insights and constructive comments. Joining Instagram artist circles and participating in community challenges can also connect you with professionals and peers, fostering an environment of continuous learning and improvement.
Beginner’s Guide to Procreate
Our Beginner’s Guide to Procreate is the ultimate resource to kickstart your digital art journey. It covers everything from the basics of navigating the app to advanced techniques for creating stunning artwork so that you can not only get off to a strong start but gain confidence quickly. Dive in and unleash your creativity with Procreate!
Frequently Asked Questions for How to Draw a Dragon in Procreate
Drawing a dragon in Procreate can be a fulfilling project. This section addresses common questions you may have, ranging from initial sketches to fine details and the best tools for the task.
