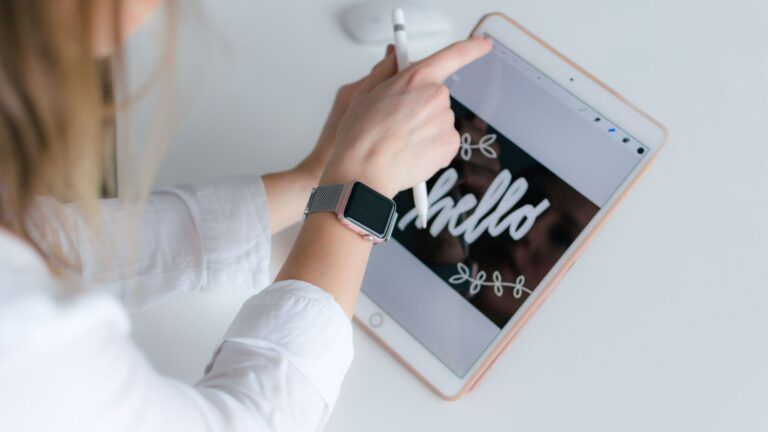
Diving into digital art on your iPad can be both exhilarating and challenging, especially if you’re trying to master Procreate, a go-to app for artists and designers. Layers are a fundamental element of Procreate, similar to how they function in traditional graphic design software. Think of layers as transparent sheets stacked on top of each other, where each layer can hold different elements of your artwork. This allows for a non-destructive way to work, as you can edit or remove an aspect of your piece without altering the rest of the image. Ready to learn more about layers? That’s what we’ll show you how to work with in our Procreate layers tutorial.

Using layers effectively can significantly improve how you create your digital pieces. Tapping the layers icon reveals all your layers, where you can add, delete, duplicate, or merge them to achieve intricate effects or simple alterations without compromising your overall design. Have you ever found yourself wishing you could tweak a portion of your artwork without having to redo the whole thing? That’s the beauty of layers at work!
Leveraging the power of layers doesn’t have to be a solo journey. Numerous videos are available to guide you through specific techniques, such as alpha locks, masking, and blending modes, and we’ve attempted to provide some of the best ones in our Procreate layers tutorial. These resources are not only instructive but also a source of inspiration for creative explorations. Remember, whether you’re a budding artist or a seasoned pro, making the most of layers in Procreate can open up a new world of possibilities for your digital artistry. Ready to tap into the full potential of your iPad’s art studio with Procreate?
What are Layers?
What are Layers in Procreate?
Think of layers in Procreate as transparent sheets piled on top of each other. Each layer holds different bits of your art, much like stacking tracing paper to create a complex drawing. They allow you to work on individual elements without disturbing the rest of your masterpiece. You can add, tweak, or hide layers and this flexibility is a cornerstone of digital art.
How Procreate Layers Work
When you work with layers in Procreate, you interact with your art piece by piece. Imagine you want to adjust the color of just one object in your scene. With layers, you can isolate this object on its own layer and edit to your heart’s content. Touch up a smudge, shuffle elements around, or completely transform a section—without the fear of ruining your entire piece. Layers follow a hierarchy, where those at the top obscure parts of the layers beneath them.
Importance of Layers in Digital Art
Layers are crucial in digital art because they give you control. Have you ever made a mistake and wished for a magic undo button that won’t revert your last hour’s work? With the ability to lock and hide layers or apply changes to select areas, they boost not just your creative freedom but also your efficiency and the ability to experiment safely. Whether you’re a seasoned artist or new to Procreate, utilizing layers effectively is key to a smoother, more enjoyable creative process.
Using Layers in Procreate
Alright, so you’ve got Procreate and you’re itching to make some art, right? Before you dive in, as part of our Procreate layers tutorial, we’re going to talk about why you’d want to use layers in the first place.
Benefits of Using Layers in Procreate
Have you ever had that “oh no” moment after painting a masterpiece, realizing you need to change something that’s buried beneath other details? Layers in Procreate are your safety net, allowing you to isolate elements of your artwork for easy adjustments—whether that’s tweaking colors, trying out different compositions, or testing visual effects without committing. They offer you the flexibility to:
- Modify elements without disrupting your whole piece.
- Create non-destructive edits, safeguarding your original work.
Think of layers as transparent sheets that you can shuffle, blend, and experiment with, without the fear of messing up. You can test out different ideas on separate layers with the freedom to hide, erase, or adjust them independently.
How Layers Can Help You Work More Efficiently
The thing about using layers is that they’re not just for the overly cautious. They are for any digital artist who wants to work smarter, not harder. Here’s how layers can up your efficiency game:
- Organization: Say goodbye to the chaos by keeping elements neatly separated.
- Streamlined workflow: Easily navigate between different parts of your piece without losing your place.
- Speed: Ready for lightning-fast edits? That’s what happens when you don’t have to sift through one tangled mass of pixels.
By taking advantage of layer options, like merging, grouping, and adjusting opacity, you keep your workflow as smooth as your brush strokes.
Examples of How Layers Can Be Used to Create Complex Artwork
Ever wonder how artists conjure up images that look like they took forever to conjure up? Often times, it’s layers that allow them to achieve amazing effects, so let’s look at how layers can be used to build complexity:
- Backgrounds to Foregrounds: Work from bottom to top, layering background elements first, then midground, and finally foreground, to create depth.
- Textures and Effects: Use separate layers to add textures, shadows, or light effects, tuning each layer’s settings to perfection.
Each layer is like a building block, and your artwork is the castle. With each layer serving a distinct purpose and allowing for individual adjustments, you end up crafting a piece with intricate details that all come together harmoniously in the end.
Creating a New Layer
With the ability to create layers, you can stack, manipulate, and experiment with different elements of your artwork without any commitment. So, next up in our Procreate layers tutorial is diving into how you can add a new layer to your canvas.
How to Create a New Layer in Procreate
Wondering how to add a new layer to your digital artwork? Simply open your canvas and look for the Layers Panel—it’s icon looks like two stacked squares, typically found at the top-right corner of your screen. Tap the + button at the top of this panel and a new layer appears above the active one. Keep in mind you can stack up layers to organize your artwork or separate elements you want to edit individually.
Different Types of Layers Available in Procreate
Procreate doesn’t just give you one kind of layer. It actually offers a variety of layer types to match your creative needs. Beyond the basic layer, you have the Private Layer option that keeps certain parts of your artwork tucked away from gallery views and time-lapse exports—perfect for work in progress or sensitive content. Experiment with these options to find out which layer type enhances your workflow and creative expression.
| Layer Type | Description |
|---|---|
| Standard Layer | The default layer for drawing and painting. |
| Private Layer | Doesn’t show in gallery previews or time-lapses. |
When to Use Different Types of Layers
So, when should you use different types of layers? Think of standard layers as your go-to for every step of your drawing process—they’re the bread and butter of Procreate layering. Use them to separate elements like line art, coloring, and shading. Now, imagine you’re working on a birthday card but want to keep your sentimental message hidden until it’s revealed; this is where a Private Layer shines. No sneak peeks in your gallery or during your time-lapse replay. Each layer serves a purpose, and using them wisely can elevate your drawing experience.
Remember, layers handle mistakes (just hit Undo!). Feel free to rearrange, converge, or discard them as your artwork evolves. That’s the beauty of Procreate!
Procreate Layers Tutorial: How to Rename a Layer
When you’re knee-deep in a digital painting on Procreate, keeping track of your layers can be like trying to herd cats—messy and confusing. Let me show you how to tame that layer stack with a simple rename. It’ll be a game-changer for your workflow!
How to Rename a Layer in Procreate
Have you ever spent minutes trying to find which layer that tiny little detail was on? Worry no more! Just follow these steps to rename a layer in Procreate:
- Open your Layers Panel: Tap the two overlapping squares icon on the top-right of your canvas.
- Access Layer Options: Tap on the layer you want to rename to bring up its options.
- Choose Rename: You’ll see a menu with various options. Tap ‘Rename’.
- Enter the New Name: Type in your preferred layer name and voila! You’re all set.
Remember, tap ‘Done’ on your keyboard to save the new name. It’s like naming your pets—it should be fun and informative!
Importance of Naming Layers for Organization and Workflow
Ever tried finding a needle in a haystack? That’s your Procreate project without named layers. Here’s why this matters:
- Avoid Confusion: Naming layers helps you to avoid that “Which layer was it again?” moment.
- Efficiency is Key: Quickly locate and manipulate the correct layer without disrupting others.
- Streamlined Process: Especially with animation or complex projects, named layers keep your sanity intact and your workflow smooth.
Think of your layers like chapters in a book. Without names, finding the plot twist would be a nightmare. Keep it neat, and you’ll thank yourself later!
Moving Layers
Mastering layer movement in Procreate is key to managing your canvas effectively. Let’s get into how you can shuffle layers around with just a few taps.
How to Move a Layer in Procreate
To move a layer, tap on the ‘Layers’ panel to open it up. Find the layer you want to move. Press and hold the layer with your finger or stylus, and then drag it to its new position. When you release, it will snap into place.
How to Move a Layer Above or Below Another Layer
Want to rearrange your stack? Press and hold the layer you want to move, then drag it up or down in the layers panel. A blue line will indicate where it’ll drop. Release to place it above or below another layer, reshaping the order of your composition seamlessly.
How to Move a Layer to Another Canvas
Got a layer that’s perfect for another digital artwork? Open the destination canvas, and make sure it’s active. Swipe left on the layer you want to transfer and select ‘Copy’. Then, go back to your destination canvas, tap the wrench icon, select ‘Add’, and hit ‘Paste‘. Just like magic, your layer pops onto your new canvas!
Duplicating Layers in Procreate
Making a copy of your artwork by duplicating layers in Procreate might sound like a magic trick, doesn’t it? But it’s actually super simple and hugely valuable for your digital art process. We’re going to dig into that process in this section.
How to Duplicate a Layer in Procreate
Ever found yourself stuck in a creative loop, wishing you could just clone that perfect layer? Well, you’re in luck! Here’s a quick how-to:
- Find your Layers Panel: It’s hiding in plain sight at the top right of your Procreate canvas, sporting a stylish square icon.
- Swipe to Impress: Got that layer you want to copy? Swipe left on it, and a little duplicate option will coyly make an appearance.
- Hit the Duplicate Button: Give that button a tap, and voilà, you’ve got an identical twin layer!
Remember, it’s all about the swipe and tap—feels like being a digital magician, right?
Benefits of Duplicating Layers
Now, you might wonder, “Why should I bother duplicating layers?” Well, here’s the scoop:
- Safety Net: Messed up? No sweat! Your original layer is safe and sound, ready for another go.
- Experiment: Want to try different color schemes or effects? Duplicate and play away without risking unwanted changes to your work.
- Improved Workflow: Keep copies for various stages of your art. This is great for those before-and-after moments.
At Drawing Tech World, we’ve come to think of duplicating layers as a secret weapon in Procreate. It’s significantly helped us improve our workflow and reduce our fears of making mistakes, and we know that mastering layers can help you do the same.
Deleting Layers in Procreate
Getting to know your way around Procreate’s layer system will not only make your artwork pop but also keep your digital canvas organized and clutter-free. Ever find yourself with too many layers crowding your space? Not to worry: tidying up your layer panel is fairly easy to do, and we’ll delve into that now.
How to Delete a Layer in Procreate
Ever been in that moment where your Procreate canvas feels like a party that’s just too crowded? Here’s the simple step-by-step to rectify this:
- Open the Layers Panel: On the top right of your screen, you’ll see an icon that looks like two squares stacked together. Give that a tap to bring up all the layers you’re working with.
- Select the Layer: Now, find the layer that’s overstaying its welcome. Just one tap and it’ll highlight to tell you it’s selected.
- Swipe to Delete: With a swift swipe to the left on the selected layer, a ‘Delete’ button will magically appear.
- Tap to Confirm: Hit that delete button and poof! Your canvas is now one layer lighter.
Remember, if you tap too zealously and bid farewell to the wrong layer, simply two-finger tap to undo.
Deleting Unnecessary Layers
Why should you care about ditching those extra layers? Well, it’s like cleaning your room; it makes finding what you need a whole lot easier and it’s seriously satisfying. Plus, Procreate runs more smoothly when it’s not overloaded with layers you’re not using. Let’s break it down:
- Streamline Your Workflow: Fewer layers mean less time scrolling to find the one you need.
- Avoid Confusion: With names like ‘Layer 53’ and ‘Layer 54,’ it’s easy to get lost. Keep only what’s essential.
- Performance Perks: Procreate has a layer limit based on your iPad’s RAM. Fewer layers free up memory, which can help Procreate run faster.
These are just a few ways that layers keep your artwork clean and organized.
The next few topics in our Procreate layers tutorial are a little more advanced, and we’re excited to show you more features.
Locking Layers in Procreate
Whether you’re a newcomer or a seasoned artist, mastering layers in Procreate can up your game significantly. Let’s dive right in and make sure your art stays just the way you want it, by learning all about locking layers.
How to Lock a Layer in Procreate
Ever had that ‘oops’ moment when you accidentally edit the wrong layer? Locking a layer puts a stop to that. Here’s the lowdown on securing your layers:
- Open the Layers Panel: Tap on the two squares icon on the top-right.
- Swipe Left: Find the layer you want to protect and swipe left on it.
- Tap the Lock Icon: See the lock icon show up? Tap it.
- Check the Lock Symbol: A little lock symbol will appear on your layer, signaling it’s safe from edits.
Benefits of Locking Layers
Got your favorite elements just right? Then it’s a good idea to lock them. Here’s why:
- Prevent Accidents: Locking layers keeps your perfected sections untouchable. No more heartaches from accidental strokes.
- Focus: Work on other layers without the distraction of editing the wrong one.
- Stay Organized: With locking, your layer structure remains intact, making complicated projects less daunting.
Locking layers in Procreate is your ticket to a smoother, mistake-free creation process. Isn’t it nice when the only surprises you get are happy ones?
Changing Layer Opacity in Procreate
Mastering opacity settings in Procreate adds depth to your artwork and gives you control over its transparency. Let’s explore how adjusting layer opacity can transform your art!
How to Change the Opacity of a Layer in Procreate
Are you ready to give your digital artwork that professional touch? Tweaking layer opacity in Procreate is straightforward. Here’s how:
- Open Your Project: Tap to open Procreate, and select the artwork you want to adjust.
- Access Layers Panel: Hit the two overlapping squares icon — that’s your Layers panel.
- Choose Your Layer: Find and tap the layer whose opacity you want to change.
- Adjust the Opacity:
- With a Slider: Simply slide your finger on the opacity slider that appears when you tap the ‘N’ on your selected layer.
- Or Using Gestures: If you’re into shortcuts, use two fingers to tap and hold on the layer to bring up the opacity slider.
Remember, the opacity scale runs from 0% (completely transparent) to 100% (completely opaque). Slide to the left for less opacity, or to the right for more. You’ll see the changes in real-time!
How Changing Layer Opacity Can Affect Your Artwork
Wondering why messing with opacity is such a game-changer? Changing layer opacity impacts the transparency and blend of your artwork’s layers. As you reduce opacity, you allow underlying layers or your canvas to show through, creating nuanced effects and soft transitions.
- Creating Depth: Lowering opacity on certain layers can create a sense of distance or a focal point.
- Blending Modes: Combining reduced opacity with different Procreate blending modes opens a whole world of texture and color interactions.
- Subtlety in Detail: Highlights and shadows with tweaked opacity can make your artwork pop with subtlety and realism.
By understanding the power of opacity, you’re unlocking an essential tool in your Procreate toolkit. You will be able to go from generating flat images to creating complex designs with depth.
Clipping Masks in Procreate
Unleashing your artistic potential in Procreate is super easy once you get the hang of clipping masks. Let’s break down what clipping masks are, how to use them, and where they’ll make your digital art pop.
What Are Clipping Masks in Procreate
Ever wanted to color within the lines without stressing about spillovers? That’s where clipping masks in Procreate step in. A clipping mask is like a digital stencil. It uses the content of one layer—say, your meticulously drawn character—to define the boundaries for another layer. This means whatever you add to the clipping mask layer will only appear within the confines of that base layer.
How to Use Clipping Masks in Procreate
To create a clipping mask in Procreate, you’re going to stack your layers. Here’s how you can do that:
- Create a new layer: This will be your clipping mask layer; just tap the ‘+’ at the top of your layers’ palette.
- Set your base layer: Decide what shape or outline you want your designs confined to.
- Activate the clipping mask feature: Simply tap the layer you’ve created and select ‘Clipping Mask’ from the menu.
Once you’ve followed these steps, you’ll have a dedicated space to shade, texture, or pattern to your heart’s content—without any fear of overrunning the edges.
Examples of When to Use Clipping Masks
Clipping masks become your secret weapon in multiple scenarios. Want to add textured shading to a character’s hair? Use a clipping mask. Need to overlay a pattern onto clothing without affecting the rest of your illustration? Clipping mask to the rescue! They’re also ideal for non-destructive editing; since you’re working on a separate layer, the original artwork stays intact.
Alpha Lock in Procreate
Navigating Procreate’s layering system can be a bit like learning a secret handshake, but once you’ve got it down, you can transform your digital art workflow. Let’s hone in on Alpha Lock, a nifty feature that makes editing your artwork precise and effortless.
What Is Alpha Lock in Procreate?
Ever found yourself meticulously trying not to color outside the lines? Alpha Lock is your digital guard rails in Procreate. By locking the transparent areas of your layer, Alpha Lock allows you to edit the opaque parts without affecting anything else. Think of it as placing a stencil over your layer; only the parts you’ve already drawn on can be edited.
How to Use Alpha Lock in Procreate
To engage Alpha Lock, it’s as simple as a tap:
- Open your Layers Panel.
- Tap on the layer you wish to edit; this brings up the Layer Options menu.
- Here, you’ll select ‘Alpha Lock’ (you’ll notice a checkered pattern appear on your layer thumbnail).
Now, any brush stroke you make will only apply to the existing artwork, not the transparent parts. You’re free to shade, tint, and texture to your heart’s content without the fear of going over the edges.
Examples of When to Use Alpha Lock
Alpha Lock is multifunctional. Use it when you want to:
- Shade and Highlight: Add depth to your flat colors without creating a mess.
- Texture: Introduce texture to specific areas without the need for meticulous erasing.
- Adjust Colors: Change the hue or saturation of particular elements without affecting the rest of your canvas.
Isn’t it liberating to know you can let your creativity flow within the lines, while Alpha Lock keeps your digital crayons in check?
Layer Masks in Procreate
Layer masks are your go-to for non-destructive edits, providing you with the flexibility every artist loves.
What Are Layer Masks Are in Procreate?
Ever wondered how to hide parts of your layer without permanently erasing them? Enter layer masks. In Procreate, layer masks work by controlling the visibility of your artwork. They use black, white, and shades of grey to define what’s visible – black conceals, while white reveals. It’s like having an eraser that you can undo, tweak, and adjust without any commitment issues.
How to Use Layer Masks in Procreate
To get started, tap the layer you want to mask in your Layers panel. Next up, hit the ‘Mask’ option. Voila! A new layer appears above, just itching for your creative commands. Paint black on the mask to hide parts of your layer, or whip out white to bring them back. The best part? If you change your mind, just flip-flop the colors! It’s the ultimate edit-flex.
When to Use Layer Masks in Procreate
Imagine you’re creating a stunning skyline but want to experiment with different buildings without losing your original design. Layer masks let you do just that. Or maybe you’re drawing a character and want to try out various color palettes on the outfit. Slap on a mask, paint away, and swap hues until your heart’s content, all while keeping your precious lines intact. Isn’t that handy?
Move a Layer Above or Below Another Layer
When you’re juggling multiple layers in Procreate, knowing how to move them around will help you better manage the depth in your digital designs, so we’re now going to get into the specifics of how to shuffle and move your layers in our Procreate layers tutorial.
How to Move Layers to Create Depth in Your Artwork
Have you ever stacked cards to build a house? Well, moving layers in Procreate is kind of like that. By shifting a layer up or down, you’re actually manipulating how elements of your artwork interact.
Here’s the straightforward way to do it:
- Tap on the Layers panel — that’s the two squares icon on the top-right of your canvas.
- You’ll see your stack of layers there, each one representing a different part of your artwork.
- Press and hold the layer you want to move. It’ll slightly enlarge, and by that, you know you’ve got it!
- Drag it up to move it over another layer, injecting foreground vitality, or nudge it down to send it to the background, adding that misty sense of distance.
Remember, it’s like layering transparent papers on top of one another. Each move can create a dynamic sense of space, making your artwork pop with dimensionality. Give it a try; you might just find a new perspective!
Move a Layer to Another Canvas
When you’re working on a Procreate project, sometimes you need to shift your work from one canvas to another.
How to Transfer Layers Between Canvases
Here’s a step-by-step guide on how to use this super handy feature:
- Open your current project: Launch Procreate and tap on the artwork with the layer you want to move.
- Navigate to the Layers Panel: Give the layers panel a tap—it’s that two-square icon on the right.
- Select the Layer: Now, press and hold the layer in question until it slightly lifts off the panel.
- Switch to the Gallery View: Keep holding that layer; it’s not time to let go yet! Drag it to the upper left corner to enter your Gallery.
- Drop the Layer into the New Canvas: Drag your selected layer onto the thumbnail of the destination canvas. Hold it there until the canvas opens, then drop the layer where you need it.
Remember, you can do this with multiple layers at once—just select multiple layers by swiping right on each one before lifting. As you work with this feature, keep in mind, layers will maintain their original properties, ensuring a smooth transition into your new project.
Hide a Layer in Procreate
Whether you’re looking to focus on a specific area of your artwork or simply want to view your piece without certain elements, hiding layers is your go-to tool for a non-destructive workflow.
How to Hide a Layer in Procreate
Follow these steps to hide a layer in Procreate:
- Tap to open the Layers panel — you’ll find it on the right side of the screen.
- Look for the layer that you want to hide. Each visible layer will have a little checkmark symbol indicating its visibility.
- To hide the layer, simply tap on the checkmark next to the layer name. It’s now invisible on your canvas.
- To make it visible again, just tap where the checkmark used to be, and it will reappear.
Remember this toggles the visibility but doesn’t delete your layer, so you can freely hide and unhide without losing your work.
How Hiding Layers Can Help You Focus on Specific Parts of Your Artwork
Think of hiding layers as your way to remove distractions and zero in on the task at hand:
- Want to retouch the background without affecting the foreground? Hide the top layers and get busy with no fears of accidental brushstrokes.
- Fine-tuning intricate details? The spotlight is on that one section that needs your attention.
By selectively viewing layers, you maintain a clean workspace and can focus your efforts where they’re most needed.
Select Two or More Layers
If you’re still with us, nice job! This is our most in-depth Procreate layers tutorial to date, and we’re almost done. But we want to show you how to do a couple more things with layers. Now, we’re going to explore another cool trick of selecting multiple layers. Using this in your work opens the door to simultaneous edits, giving you a speed boost in your creative workflow.
How to Select Two or More Layers in Procreate
Here are the steps to select multiple layers in Procreate:
- Open Procreate and tap on your desired project to bring up the canvas.
- Look for the Layers Panel (it’s the icon that looks like two squares wedged together).
- Now, here comes the cool part: Touch and swipe right on the layers you want to select (you’ll see them highlight in blue).
How to Edit Multiple Layers at Once
Picture this: you’re juggling a bunch of layers, and suddenly, you need to move them all. Before you start sweating at the thought, here’s what you do:
- Once you’ve selected your layers, any transformation or adjustment you apply with your tools will affect all the selected layers.
- Transform Tool: Need to resize or rotate? Tap on the arrow icon at the top, and all your selected layers will obey your command together.
- Adjustments: Want to tweak the brightness or add a filter? Hit the magic wand icon, and your changes will apply to the entire layer selection.
Following these steps will negate the need for you to edit one layer at a time, saving you some time and frustration.
How to Create a New Group of Layers in Procreate
To create a new group of layers in Procreate, here’s what you need to do:
- Open your Layers Panel by tapping the two squares icon (usually located in the upper right-hand corner of your screen).
- Select Multiple Layers by swiping right on each layer you want to group. You’ll see they become highlighted.
- Group the Selected Layers by pinching them together with two fingers or by tapping the ‘Group’ button that appears at the top of the Layers Panel.
Once you follow these steps, you will just have created a new group of layers in Procreate. If you make a mistake, don’t stress—simply undo with a two-finger tap.
How to Use a Group of Layers to Organize Your Artwork
Now that you’ve got your group of layers, you might be wondering, “How can I use this to keep my digital canvas neat and tidy?” Let’s break it down:
- Naming Your Groups: To avoid any head-scratching later, name your groups. Just double-tap on the group folder and type away.
- Reordering Groups: Drag and drop groups to rearrange them, just like you would with individual layers.
- Toggling Visibility: With a tap, you can hide or show entire groups, which is a real eye-opener for managing complex compositions.
By mastering these tricks, you’ll keep your Procreate project as organized , with every piece of your artwork ready to be displayed or tucked away as needed. For learn about how to master additional techniques beyond our Procreate layers tutorial, check out our Complete Guide on How to Draw in Procreate.
Conclusion
Congratulations! You’ve finally reached the end of our Procreate layers tutorial. We hope by now that you’ve embraced the power of layering. Remember, layers are your friends—they’re here to keep your work flexible and your artistic process fluid.
What can layers do for you? They let you:
- Experiment without fear of ruining your work
- Organize your art into manageable sections
- Tweak and adjust elements independently
And don’t forget, you’ve got tools like alpha lock, clipping masks, and blending options at your fingertips for even more control.
Feeling overwhelmed? Just take it one layer at a time! Trust in your new found knowledge, and next thing you know, you’ll be layering like a pro.
Use this guide as a stepping stone, and remember:
- Practice makes perfect
- There’s no limit to how many layers you can play with
- The Undo button is always there if you need it
So, keep creating, stay curious, and enjoy the boundless creativity that Procreate Layers brings to your digital artistry journey. Happy drawing!
Frequently Asked Questions
Here are some of the top FAQs on creating layers that we’ll answer as part of our Procreate layers tutorial.
