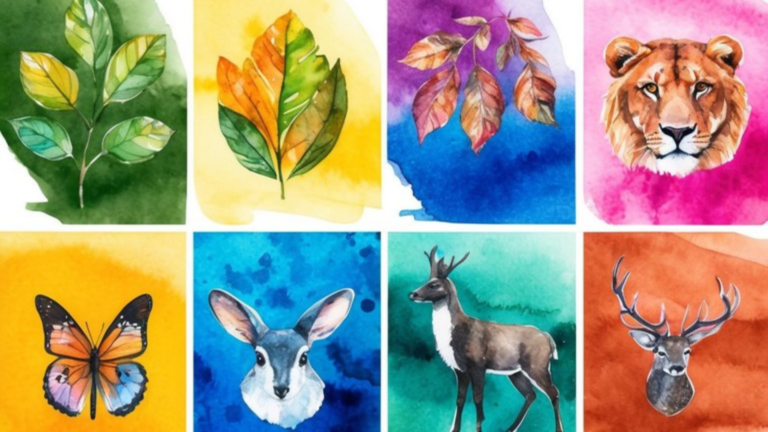
Watercolor painting has a unique charm that captures both the fluidity and subtlety of color like no other medium. Thanks to modern technology, Procreate—a powerful digital painting app on the iPad—brings the essence of watercolor to your fingertips without the need for water, paper, or paints. The app’s intuitive interface coupled with the sophisticated touch sensitivity of the iPad and Apple Pencil delivers a natural and immersive watercolor experience.
When embarking on your digital watercolor journey, you’re bound to become acquainted with the variety of brushes available in Procreate. With a meticulously curated brush set, Procreate allows you to mimic the behavior of real watercolor strokes, offering a range of possibilities from delicate washes to bold and vibrant details. These brushes can be customized, ensuring that your digital canvas reflects the nuanced textures and depth synonymous with traditional watercolor artworks.
The transition from physical to digital watercolors is effortless due to Procreate’s user-friendly design. Starting a new canvas is as simple as tapping an icon, and the brush library is readily accessible, allowing you to experiment and select the perfect watercolor brush for your piece. Understanding how to manipulate brush properties and recognizing the interaction of digital paint layers plays a crucial role in achieving the desired watercolor effect. With practice, you’ll harness the control and endless versatility that digital watercolor in Procreate offers, elevating your artistic expression to new heights.
Setting Up Your Canvas
Creating watercolor artwork in Procreate starts with a good foundation, which means setting up your canvas correctly. Whether you’re using an iPad Pro and Apple Pencil or another model, the canvas size and understanding the interface are crucial for ensuring that your digital watercolor texture and resolution meet your artistic needs.
Choosing the Right Canvas Size
In Procreate, initiating a new canvas is a simple process:
- Tap the + icon in the gallery view.
- Select from pre-set sizes or opt for ‘Custom Size’ to input your own dimensions.
When considering size, remember:
- Purpose: Are you designing for digital display or print? Higher DPI (dots per inch) betters print quality.
- Performance: Larger canvases with a higher DPI may affect your iPad’s performance due to the increased demand on memory and processing power.
- Limitations: Each iPad model has a maximum number of layers, which decreases as canvas size increases.
| Intended Use | Suggested DPI | Suggested Size |
|---|---|---|
| Digital Display | 72 DPI | 2048 x 2048 pixels |
| Professional Print | 300 DPI | 2480 x 3508 pixels |
Understanding Procreate’s Interface
To access brush settings and further canvas options, familiarize yourself with the following steps:
- Open your canvas by tapping on it from the gallery.
- The Brush Library is accessible via the paintbrush icon in the top right-hand corner. This is where you’ll find tools to create watercolor effects.
Keep in mind:
- ‘Actions’ (wrench icon) allows you to adjust canvas settings like size and DPI.
- Texture can be affected by brush selection and the paper texture you choose or import.
- The ‘layers’ panel is essential for non-destructive editing, allowing you to paint on different layers without altering the underlying ones.
Understanding Procreate’s interface and selecting the right canvas size are essential steps in digitally replicating the nuanced effects of watercolor painting on your iPad.
Selecting Brushes for a Watercolor in Procreate
When working with watercolor in Procreate, selecting the right brushes is essential for achieving the desired effects. Each brush can offer a different texture, opacity, and edge, which are vital components of watercolor painting.
Using Pre-made Watercolor Brushes
Procreate offers a variety of pre-made watercolor brushes that can be found in the Brush Library. These brushes simulate watercolor textures and behaviors, and each has unique properties:
- Textures: Ranging from soft and diffuse to granular and speckled.
- Opacity: Some brushes apply paint more opaquely, while others have a more transparent effect.
- Edges: You can find brushes with crisp edges or more blurred ones akin to watercolor bleeds.
To select a pre-made brush, simply tap the brush icon on the top right side of the screen and explore the Watercolor brush set included with Procreate. Experiment with different brushes to understand how they interact with the canvas and what visual outcomes they produce.
Creating Custom Watercolor Brushes
If the existing brushes don’t meet your requirements, Procreate enables you to create custom watercolor brushes. Here’s how you can start:
- Access the Brush Library by tapping the brush icon.
- Tap the “+” symbol to create a new brush.
- Adjust settings to modify the brush behavior and texture for your watercolor needs. Key settings include:
- Shape and Grain source to define the brush’s texture.
- Dynamics to control how the brushstroke behaves with pressure.
- Opacity and Flow for the transparency levels and the amount of ‘paint’ released.
Remember, creating effective watercolor brushes involves fine-tuning settings like jitter, scatter, and wet mix, which control how much the brush fluctuates and blends with existing pixels on the canvas.
For more custom brushes, you can check out our post on how to create a real-life watercolor scene using The Watercolor MaxPack.
For more on creating your own brushes in Procreate, check out our complete guide, and also be sure to check out our guide on watercolor Procreate brushes as well!
Basic Watercolor Techniques in Procreate
Creating watercolor artwork in Procreate involves mimicking traditional watercolor techniques through digital means. With Procreate’s brush sets and the Apple Pencil, you can replicate effects like wet-on-wet, dry brush, and bleeding that are foundational to watercolor painting.
Applying the Wet-on-Wet Technique
To achieve the wet-on-wet watercolor technique in Procreate, you should start with a watercolor brush loaded with minimal color. Gently stroke the digital canvas to lay down a soft wash of color. Next, without letting the first layer dry, add another color onto the still-wet wash. Watch as the new color softly spreads into the first, creating seamless gradients and transitions characteristic of wet-on-wet watercolor effects.
Mastering the Dry Brush Effect
For the dry brush technique, select a watercolor brush within Procreate that has a coarse texture. Ensure your brush opacity is lower to simulate the scarcity of water. Then, with swift, light strokes, drag the brush across your canvas to let the texture of the paper show through the pigment. This technique creates the look of a brush that skims across the surface with minimal paint, a hallmark of dry brushwork in traditional watercolors.
Exploring the Bleeding Effect
The bleeding effect in watercolor occurs when a color spreads into its neighboring wet paint, blending in a natural and unpredictable manner. In Procreate, after applying a wet base color, introduce a new color close to the wet edge with a low-opacity brush. The digital brushstrokes should blend as if the pigment is diffusing into the damp area, capturing the essence of watercolor bleed. Experiment with pressure and brush size to control the intensity and spread of the bleed.
We’ve included a great walk-through video above to get you started, but if you want some additional practice, be sure to check out our guide on Procreate watercolor brushes.
Working with Layers and Opacity
In digital watercolor painting with Procreate, mastering layers and their opacities is essential for achieving depth and texture. Your ability to manipulate these elements will define the realism and mood of your watercolor artwork.
Understanding Layers in Watercolor
In Procreate, layers function like transparent sheets that you can paint onto. They allow you to work on individual elements of your painting without affecting others. For watercolor effects, you should create separate layers for different colors and parts of your composition.
- Base layer: Start with a base layer to set the background color.
- Additional layers: Add more layers for each color or watercolor effect you plan to incorporate.
When you’re layering watercolors, the Multiply blend mode is particularly useful as it simulates the effect of pigment buildup, where colors interact and intensify as they overlap.
Managing Opacity and Blending Modes
Opacity controls how see-through a layer is. Adjusting a layer’s opacity in Procreate can mimic the watercolor effect of diluting pigment with water, thus affecting the intensity and transparency of your colors.
- To adjust layer opacity:
- Open the Layers panel and select the layer you want to edit.
- Tap on the ‘N’ to bring up the blend modes menu.
- Use the opacity slider to reduce or increase the transparency of your layer.
Blending modes, on the other hand, change how layers interact with each other. The watercolor look often benefits from blending modes such as Multiply, which makes layers interact in a way that emulates real watercolor behavior.
- To change blend modes:
- Open the Layers panel.
- Select the desired layer and tap the ‘N’ symbol.
- Choose Multiply or another blend mode to create the desired effect.
By understanding layers and how to control their opacity and blend modes, you can create complex and beautiful watercolor illustrations in Procreate. Use these techniques to let your creativity flow and build up your digital watercolor masterpiece layer by layer.
Color and Texture
In Procreate, mastering the watercolor effect hinges on selecting apt color palettes and creating authentic textures. Your artistic vision comes to life by utilizing color variation and gradients and by emulating the natural dynamics of watercolor media.
Choosing Watercolor Palettes
Your choice of watercolor palettes is foundational in setting the mood for your piece. Procreate allows for a wide range of colors, so choose hues that complement each other and reflect the emotion you want to convey. You can create a custom watercolor palette by:
- Selecting the color wheel to choose base colors.
- Adjusting the saturation and brightness for a full spectrum of shades.
- Saving the selected colors into your palette for consistent use.
By building your palette carefully, you ensure a harmonious blend throughout your artwork.
Creating Texture with Watercolor Brushes
Texture is a critical characteristic of watercolor painting, and Procreate offers specialized brushes to simulate this. To create a convincing watercolor texture:
- Use Procreate’s watercolor brushes to lay down the base texture.
- Vary brush sizes to produce different wash effects and layering.
- Apply lighter strokes for dry brush effects and heavier ones for wet washes.
- Work on a separate layer for textures to control their intensity and blend modes easily.
Through these methods, your digital watercolor can achieve a look that rivals traditional paper textures.
Utilizing Color Variation and Gradients
Gradients and color variations are essential for adding depth and realism to watercolor paintings. Procreate can simulate watercolor fluidity by blending colors naturally. To enhance your painting with gradients:
- Select two or more colors and use the blending tool to create soft transitions.
- Layer different opacities of the same color for subtle variation.
- Experiment with blending modes to see how colors interact with each other.
Incorporating these techniques enriches your watercolor illustrations with lifelike transitions just as actual watercolors blend on paper.
Adding Final Touches
In the final stage of creating a watercolor piece in Procreate, attention to detail and subtle enhancements make your artwork stand out. Proper use of fine brushes, clipping masks, highlights, and shadows will bring depth and realism to your watercolor details.
Incorporating Details with Fine Brushes
When adding finer details to your watercolor painting, select a brush that mimics a real fine-tip watercolor brush. Procreate offers watercolor fine brushes that allow you to create delicate lines and textures. Begin by:
- Zooming into the area you want to detail to ensure precision.
- Adjusting the brush size and opacity for desired effect.
- Gently laying down strokes to suggest texture and form without overpowering the underlying layers.
Using Clipping Masks for Controlled Effects
Clipping masks are a powerful tool for applying effects to specific parts of your artwork without altering the rest. To use a clipping mask for watercolor effects:
- Create a new layer above the one you wish to affect.
- Tap the new layer and select ‘Clipping Mask’.
- Paint or apply adjustments on this layer to control where you want to enhance your watercolor painting.
Adding Highlights and Shadows
Highlights and shadows are crucial for giving your watercolor dimension. For highlights, use a lighter tone of the color present on your painting and apply with a tapered brush for a subtle glow. For shadows:
- Opt for a darker shade or a complementary color to create depth.
- Use layer blending modes like Multiply to integrate shadows seamlessly.
- Apply with a low opacity to build up the effect gradually.
Remember, less is often more; it’s easier to gradually build up these final touches than to subtract them.
Realistic Watercolor Effects
Creating realistic watercolor effects in Procreate hinges mainly on simulating the paper’s texture and mastering the use of various brushes to create splatters and smudge effects. These elements contribute significantly to the authenticity of digital watercolor artwork.
Simulating Watercolor Paper Texture
To begin, choosing the right watercolor paper texture provides the necessary foundation for realistic watercolor effects. In Procreate, the texture brush plays a critical role in adding depth and realism to your artwork. Start by selecting a high-quality watercolor paper texture brush to create a textured background layer. This mimics the tooth of real watercolor paper, which is essential for the overall effect.
- Import the brush set with a watercolor paper texture.
- Create a new layer for the background.
- Select the watercolor texture and apply it across the canvas.
This initial layer will interact with watercolor brushes to give a tactile feel to your painting.
Recreating a Watercolor in Procreate with Splatters and Smudges
Watercolor painting is known for its fluidity and the occasional unplanned splatter or smudge that adds character to a piece. Achieving this in Procreate can be done using splatter brushes and the smudge tool.
- For splatters:
- Pick a splatter brush from your brush library.
- Practice on a new layer to control the placement and effect.
- For smudges:
- Use the smudge tool with a watercolor brush selected to softly blend colors.
- Adjust the brush size and strength based on the desired watercolor effect.
By layering splatters and strategic smudging, you introduce the unpredictable charm of watercolor that enhances the realism of your digital painting. Explore tutorials on these techniques to refine your skills and add authenticity to your Procreate watercolors.
Saving and Exporting Your Artwork
When saving and exporting your digital watercolor painting in Procreate, it’s crucial to choose the correct file format to maintain the quality and layers of your project. This ensures your artwork can be used effectively across different mediums, be it web or print.
Choosing the Right File Format
When you’re ready to save your artwork, tap Select from the top corner of the Procreate gallery and choose the pieces you wish to save. For ongoing work or future editing, save your projects in the Procreate format (*.procreate), which preserves all your layers and the ability to edit later. However, if you’re looking to share your work or print it, consider exporting as a PSD, PDF, JPEG, or PNG depending on the final use. A PNG format is ideal for maintaining a transparent background, especially useful for digital watercolor paintings.
- .procreate: Preserve layers and future editability
- .PSD: Compatibility with Adobe Photoshop
- .PDF: For printable documents
- .JPEG: Widely used, small file size, no transparency
- .PNG: Supports transparency, good for web
Optimizing for Web and Print
Exporting for Web: To optimize your digital watercolor artwork for web use, it’s often best to export as a JPEG or PNG. These formats are widely recognized and keep file sizes manageable without sacrificing too much quality. To export, tap Share, select your desired format, and adjust quality settings to balance image quality with file size.
- JPEG: Lower the quality to reduce file size for faster web loading.
- PNG: Use when you need to preserve transparency.
Exporting for Print: When exporting for print, choose PDF if you’re creating documents or high-quality JPEG for photographic prints. Ensure the resolution is set to at least 300 DPI for print quality, and if color fidelity is critical, incorporate color management in your exporting process.
- PDF: High-quality vector format for documents.
- JPEG: High resolution, set to 300 DPI for prints, include color profiles if necessary.
Remember to back up your Procreate files to iCloud or an external hard drive to prevent any loss of your projects.
Frequently Asked Questions
In this section, you’ll find concise answers to commonly asked questions about creating watercolor effects in Procreate, helping you enhance your digital art skills effectively.


