
Are you looking to create a stunning piece of digital art featuring a mason jar filled with coffee using Procreate? This tutorial is perfect for both beginners and intermediate artists who want to expand their skills. By following this step-by-step Procreate mason jar coffee tutorial, you will master the techniques necessary to bring a realistic, charming mason jar coffee illustration to life.
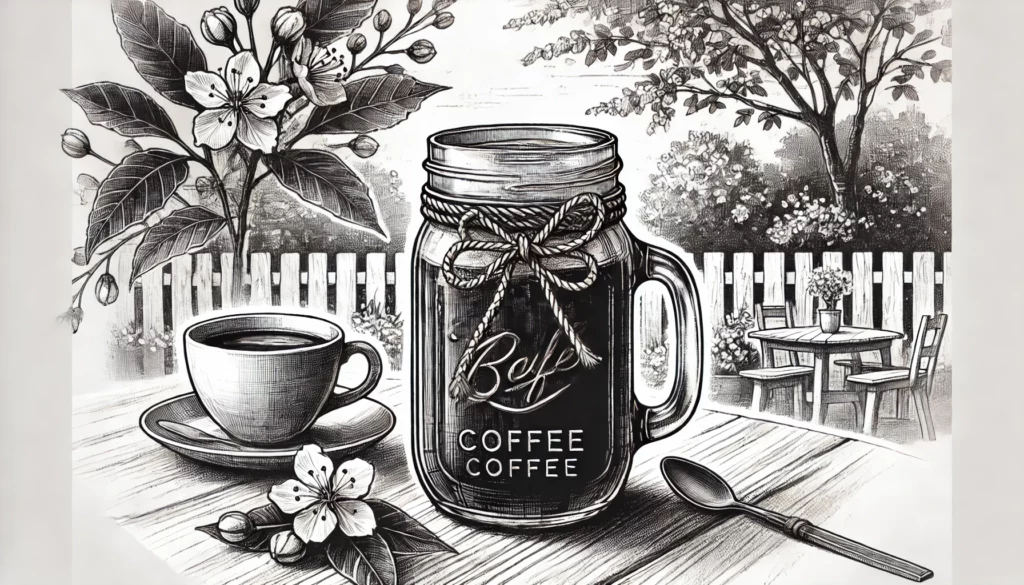
Imagine having the ability to capture the soothing hues and textures in Procreate of coffee in a jar, complete with intricate details like reflections and shadows. With Procreate, not only will you learn to draw, but you’ll also gain a deeper understanding of layering, shading, and color blending. This tutorial will walk you through each stage, making the process enjoyable and achievable.
Unlock your artistic potential by transforming a simple idea into a captivating digital artwork. You’ll be amazed at how quickly you can create professional-looking illustrations. Dive into the world of Procreate and let your creativity flow through your newfound skills!
Understanding Procreate
Procreate is a powerful digital illustration app popular among artists for its versatility and robust set of tools. Regardless of your skill level, mastering the app involves understanding its basic features, exploring specific art concepts like drawing mason jars, and utilizing various digital art techniques.
Basics of Procreate
Procreate offers a user-friendly interface designed specifically for the iPad. You will find essential tools like brushes, layers, and color palettes.
Brushes are highly customizable, allowing you to create different textures and effects. Layers help manage different parts of your artwork, making it easy to edit without affecting the whole piece.
Additionally, using the QuickShape tool can ensure your lines and shapes are clean and precise. This fundamental knowledge is crucial for any project. We also have a special tutorial, specifically on How to Draw Straight Lines in Procreate, if you want some extra practice.
Mason Jar Art Concepts
When focusing on drawing a mason jar in Procreate, it’s important to understand the specific elements that define its shape and texture. Begin with basic geometric shapes—an oval for the lid and a rectangle for the body.
Next, add details like the ribbed texture of the lid and the embossed design typically found on mason jars. Layering these details will enhance the 3D effect and realism.
Using references can aid in achieving accuracy, and combining different brushes for glass and metal textures improves the final result.
Digital Art Techniques
Procreate provides features that help in refining your digital art techniques. Use the Alpha Lock feature to contain shading or coloring within a specific area. Another valuable tool is Clipping Masks, which allows for non-destructive editing.
Experimenting with Blend Modes and consider creating your own Blending Brush to add depth and realistic lighting effects to your mason jar. For coloring, practice with the Color Drop feature to fill areas quickly, and use the Gaussian Blur tool for smooth gradients. Additionally, you can learn more about color palettes in Procreate to create cohesive and visually appealing color schemes for your artwork.
Mastering these techniques will significantly elevate your art, making it look polished and professional.
Gathering Your Materials
To create your Procreate Mason Jar Coffee tutorial, you’ll need both digital tools and physical inspirations. These items will allow you to bring your coffee-making artwork to life with accuracy and creativity.
Digital Tools Required
For this tutorial, ensure you have the Procreate app installed on your iPad. This app is essential for digital drawing and painting. You will also need an Apple Pencil or another stylus compatible with your device to achieve precise and smooth lines.
Another valuable tool is a high-quality screen protector. This can help improve the feel of your iPad while drawing, making it mimic the texture of paper. For referencing and organizing, consider using a cloud storage service like iCloud or Google Drive to save progress and backups.
Finally, it helps to have an external keyboard for typing annotations or adding text to your tutorial. This ensures that your workflow is uninterrupted and efficient.
Physical Inspirations
While digital tools are vital, physical inspirations play a crucial role in enhancing your artwork. Start by collecting various types of mason jars. Having these jars on hand allows you to observe their structures and details closely.
Next, gather different types of coffee beans and grounds. This helps when you’re drawing textures and shading elements related to coffee. Additionally, having a real pour-over coffee setup and aesthetic coffee mugs around can spark more creative ideas for your illustrations.
Using natural light is also beneficial. It allows you to study how light and shadow interact with the jars and coffee, adding depth to your drawings. Finally, consider creating a mood board with photos, magazine clippings, or colors that inspire you. This will keep your creative vision cohesive and focused.
Setting Up Your Canvas
For a successful Procreate Mason Jar Coffee tutorial, start by configuring your canvas correctly. Getting the right size and resolution and managing your layers effectively are key.
Canvas Size and Resolution
Select the right canvas size to suit the level of detail in your artwork. A common choice is 2500 x 2500 pixels, providing a balance between detail and performance.
Resolution is crucial; a standard 300 DPI works well for high-quality prints. Use the canvas toolbar by clicking the plus icon and setting the dimensions manually. Customize the width and height in pixels for precise control. For a mason jar coffee illustration, larger canvases offer more detail, while smaller ones allow faster work.
Layer Management
Efficient layer management enhances your workflow. Start by organizing your layers logically, separating elements like the jar, coffee, and background.
Procreate offers layer groups, which can keep your canvas tidy. Use the press and hold method to rearrange layers, ensuring elements are in the correct order. Enable page assist or animation assist if you’re creating a step-by-step animation. This makes each layer act like a frame, allowing smooth transitions between drawing stages.
Adjusting the opacity and blending modes of each layer can add depth and realism to your mason jar coffee artwork.
Sketching the Mason Jar
When sketching a mason jar, it’s crucial to focus on getting the outline and proportions correct before adding details and texture. By following these steps, you’ll have a strong foundation to build on, leading to a more realistic and satisfying final drawing.
Jar Outline and Proportions
Begin by drawing the basic outlines of the mason jar. Start with an oval shape for the base, making sure it’s slightly flattened to mimic the bottom of a jar. Next, extend two parallel lines upward from the edges of the oval to define the sides. Ensure the lines are straight to maintain the jar’s cylindrical appearance.
Now, sketch a slightly curved line across the top to form the opening. Add another, slightly smaller oval just above this line, connected by short lines to represent the jar’s neck. Pay attention to the jar’s proportions: the neck should be narrower than the body, and the height should be proportionate to the width. Keep the neck’s curvature gentle.
Adding Details and Texture
Once the outline is in place, proceed to adding details. First, draw the lid, which is essentially two concentric circles at the top, with slight lines for the ridges. To give the jar depth, add subtle curves on the shoulders and around the base. These should highlight the jar’s three-dimensional quality.
Incorporate textural elements like the glass pattern by sketching vertical and horizontal lines lightly to mimic the typical glass texture. Don’t forget to add any label or logo details, often seen on mason jars. Sketch these lightly at first, and refine them as you go. Shading will enhance the realistic appearance, so add shadows where the light doesn’t directly hit the jar, specifically along the sides and under the lid.
Optional: Coloring Techniques
In this section, you’ll learn how to bring your mason jar coffee illustration to life in Procreate by choosing the right color palette, applying base colors, and adding depth with shading and highlights.
Choosing a Color Palette
Selecting an appropriate color palette in Procreate sets the tone for your illustration. Start by considering the atmosphere you want to convey. Warm tones like browns and oranges can create a cozy feel, while cool tones could give a refreshing look.
Use Procreate’s built-in color palettes or create your own. You can import color swatches or use the Color Harmony feature to find complementary colors. Keep a balanced mix of light and dark shades to ensure your illustration has depth and contrast.
Applying Base Colors
Begin with laying down the base colors for your mason jar and coffee. Use the Monoline brush for clean, consistent lines. Fill the areas with the Color Drop tool by dragging the color from the top right corner into your selected area.
For the coffee inside the jar, choose a rich brown. You might use lighter browns for the highlights on the glass. Layer the colors for more dimension, ensuring your edges are sharp and clean.
Shading and Highlights
Adding shading and highlights is crucial for creating a realistic and dynamic illustration. Start by selecting a soft brush like the Airbrush for smooth gradient transitions. Identify your light source to determine where the shadows and highlights fall.
Apply darker shades on one side of the jar and coffee to simulate shadows. Use lighter shades to add highlights on the opposite side. Experiment with Blending Modes (like Multiply for shadows and Screen for highlights) to enhance the visual effect.
To finish, add small details such as light reflections on the glass and subtle color variations in the coffee. This attention to detail will make your mason jar coffee illustration stand out.
Creating the Coffee Effect
When working on a Procreate tutorial for a mason jar coffee illustration, securing the right coffee color and texture and rendering the liquid dynamics are crucial. Attention to detail will bring your digital artwork to life, making it appear realistic and captivating.
Simulating Coffee Color and Texture
To simulate the coffee color accurately, start by selecting a deep, rich brown from the color palette. Consider using hues like dark sienna or burnt umber for authenticity.
Layering is key. Use multiple shades to create depth. Begin with a base color and gradually introduce lighter browns to simulate light reflections. Incorporate a soft brush for blending these shades to avoid harsh lines.
Introduce texture by using brushes that mimic liquid textures. Apply subtle grain and noise to your strokes. This technique adds realism, giving the impression of coffee liquid. Make sure to adjust opacity and smoothness to ensure the texture looks natural and not overly digital.
Liquid Dynamics Inside the Jar
Creating liquid dynamics involves simulating how coffee would move inside a jar. Start by defining the liquid level. Use a slightly curved line to represent the meniscus—where the liquid touches the glass.
Utilize Procreate’s smudge tool to mimic the flow of coffee. This tool helps blend edges and creates subtle waves or ripples, indicative of liquid motion. You can highlight the movement by adding fine white streaks to indicate light reflecting off the liquid’s surface.
Shadowing is essential for depth. Darken areas where the liquid meets the glass and add lighter shades towards the center to imitate a three-dimensional effect. The interplay between light and shadow will give your coffee a dynamic and lifelike appearance inside the mason jar.
Final Touches
In this phase, you’ll bring your mason jar coffee illustration to life with the final details that make it pop. Focus on adding text and graphics as well as applying filters and adjustments to enhance the overall look.
Adding Text and Graphics
Begin by selecting a font that complements the style of your illustration. Consider bold and elegant scripts for a more artistic touch. You can experiment with positioning by using Procreate’s text tool to move text around the jar.
For a more custom look, you might want to try our Procreate for Lettering Tutorial, which allows you to hand-letter your text directly onto your illustration. This can add a unique and personal touch to your design.
Next, add any icons or stickers that accentuate your design. These could be simple coffee beans, small hearts, or artistic swirls.
Use layers to separate text and graphics from the main illustration. This makes it easier to adjust or remove elements as needed. Merge the text and graphics layers once you’re satisfied, ensuring they blend seamlessly.
Applying Filters and Adjustments
To make your illustration stand out, apply filters to adjust the colors and textures. Start by selecting a filter that enhances the overall warmth of your mason jar coffee illustration.
You might choose a vintage filter for a nostalgic feel or a high-contrast filter to make the colors more vibrant. Adjust the brightness, contrast, and saturation to fine-tune the visual impact.
Use fine-tuning tools like the curves and color balance settings to correct any color imbalances. Pay close attention to the shadows and highlights to ensure they match the light source in your illustration.
Once satisfied, save your file in a high-resolution format, ensuring that all the elements, filters, and adjustments come together for a polished, professional final piece.
Exporting and Sharing Your Work
Procreate offers various ways to export and share your mason jar coffee artwork. You can select from different file formats depending on your needs.
- Procreate Format (.procreate): This format is ideal for maintaining all layers and editing capabilities. To export, tap Actions > Share > Procreate and choose your destination.
- PSD (Photoshop Document): If you plan to continue editing your work in Photoshop or Adobe Illustrator, export as a PSD. Navigate to Actions > Share > PSD.
- PDF: For creating a document, export your layers as individual pages in a PDF. Tap Actions > Share > PDF and select quality settings: Good, Better, or Best.
- PNG: Exporting as PNG is perfect for high-quality images with transparency. Bulk export all layers from your artwork into PNG files by selecting Actions > Share > PNG.
- JPEG: Choose JPEG for universal compatibility with most devices and social media platforms. Tap Actions > Share > JPEG and select your quality preference.
Quick Export Steps:
- Open your artwork.
- Tap the Actions icon (wrench icon).
- Select Share.
- Choose your desired file format.
- Select destination (e.g., iCloud, external drive, email).
Whether you’re sharing with a client or backing up your work, these options ensure your mason jar coffee tutorial is accessible and editable across various platforms.
Beginner’s Guide to Procreate
Our Beginner’s Guide to Procreate is the ultimate resource to kickstart your digital art journey. It covers everything from the basics of navigating the app to advanced techniques for creating stunning artwork so that you can not only get off to a strong start but gain confidence quickly. Dive in and unleash your creativity with Procreate!
Frequently Asked Questions
Gain insights on creating coffee-themed illustrations using Procreate, focusing on techniques such as adding textures and utilizing alpha lock for a mason jar coffee concept.


Hi Laura~ This is a great in depth guide on creating works of art! I am not an artist- so I love how this program would give me a huge jump start. This is good timing as well. I started designing T-Shirts and was looking for additional ways I could create art work. I love the theme of hiking, but Etsy is saturated with the same type of art work, so perhaps this would give me an edge. This drawing of the Mason Jar is soo cute! I have never thought of placing coffee in a Mason Jar. Thank you so much for the inspiration!!
Hi Misty, I’m glad you found the tutorial inspirational. If you’re new to drawing, sketching a mason jar in Procreate is a great place to start. The app is only available on the iPad, and you’ll either need an Apple Pencil or a universal stylus that works with your iPad. But if you have all of that, then you’re good to go. If you have any questions as you get started, please feel free to reach out to us.